Webmin CentOS Install for Easier VPS Management
A Virtual Private Server (VPS) is a cost effective way to host web and cloud based solutions, even some high volume web sites. A VPS provides more resources (memory, processing power and disk space) than shared hosting without the cost of leasing dedicated hardware (although a VPS will not be as powerful as a dedicated machine). Some VPS packages only provide a minimal Linux system. Access to that minimal system is usually via a secure shell (SSH). Managing a Linux system remotely over SSH can be cumbersome. To make the system administration easier a web based management tool is useful. A commercial tool such as cPanel is often provided at extra cost. Open source alternatives like ZPanel and Webmin are available. In this tutorial article the Webmin system administration tool will be installed on a CentOS based VPS.

Manage a CentOS VPS Using Webmin for System Administration
CentOS is a Linux Operating System (OS) based on a Red Hat Linux distribution. CentOS is commonly available as an OS option for a VPS package subscription. This article assumes that the minimal installation of CentOS is used for the VPS operating system. The minimal CentOS does not have the desktop environment installed. The steps for the Webmin CentOS install are:
- Update CentOS using yum update.
- Add Webmin to the CentOS yum repositories.
- Add the Webmin package PGP key to the RPM keyring.
- Allow Webmin through the firewalld (CentOS 7) or iptables (CentOS 6) firewall.
- Install Webmin using yum install webmin.
- Optionally turn Webmin SSL mode off.
- Start Webmin and start using it.
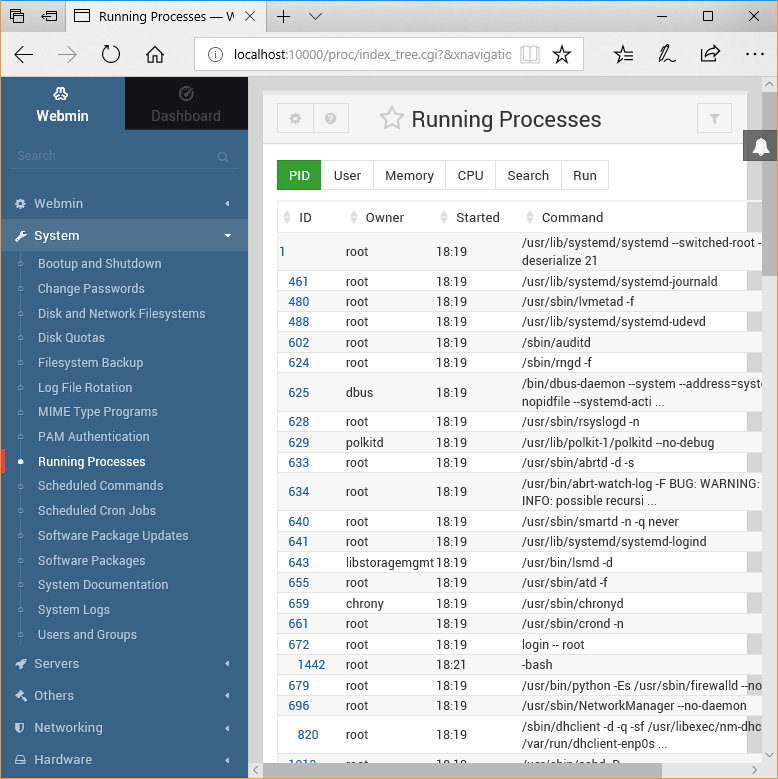
Practice Makes Perfect For Webmin CentOS Installation
These Webmin CentOS install instructions can be practised on a local computer using a virtual machine (VM). Practising the installation reduces the chance of making a mistake on a live server and risk requiring the server to be reset by the service provider. If a VPS needs to be reset it may result in lost data. Always backup any data that needs to be kept when making changes to live servers. The See Also section at the end of this tutorial has a list of articles on using a VM for CentOS.
Log on to CentOS VPS Via SSH
In this article it is assumed that the log in user is root, or a user capable of becoming a super user (sudo). For all the commands in this tutorial enter the text that follows the # prompt character (or $ prompt) and press return (Enter). Any example results from the command will be shown on the lines that follow the command. Note that the text before the # may differ from system to system, so is not shown. The sudo versions of the commands are not shown as it is assumed the reader can learn how to use sudo elsewhere.
Log in to the CentOS VPS system using SSH. On a Windows machine a programme such as PuTTY can be used for the terminal.
Update CentOS
Before installing Webmin it is worth ensuring CentOS is up-to-date. Update CentOS using yum:
# yum updateThen reboot:
# rebootLog back into CentOS.
Add Webmin To Yum Repositories
To manage the Webmin install via Yum create a Webmin Yum repo in the Yum repository directory /etc/yum.repos.d. Use the vi editor to create a webmin.repo file:
# vi /etc/yum.repos.d/webmin.repoPress i to enter insert mode and enter the following:
[Webmin]
name=Webmin Distribution Neutral
baseurl=http://download.webmin.com/download/yum
enabled=1
Press the escape (Esc) key to return to vi command mode and enter colon then wq to execute the vi write and quit commands (:wq). If you want to check the contents of the webmin.repo file use the cat command:
# cat /etc/yum.repos.d/webmin.repoAdd the RPM Key File for Webmin
Add the PGP key that the Webmin RPM package is signed with to the RPM keyring:
# rpm –import http://www.webmin.com/jcameron-key.ascAllow Webmin Through the CentOS Firewall
CentOS uses a firewall to filter network traffic. On CentOS 7 the firewall is firewalld. On CentOS 6 it is iptables. Webmin runs on port 10000 which requires editing the firewall rules. Follow these instructions for either CentOS 7 or CentOS 6. Depending upon the CentOS version used by your VPS.
Add Webmin to the CentOS 7 Firewall
The firewalld commands are issued using firewall-cmd. To check that the firewalld service is running use the state option:
# firewall-cmd --state
running
Check the default zone with get-active-zones (output will be different for other systems):
# firewall-cmd --get-active-zones
public
    interfaces: eth0
List the rules with list-all:
# firewall-cmd --list-all
public (default, active)
    interfaces: eth0
    sources:
    services: dhcpv6-client ssh
    ports: 80/tcp
    masquerade: no
    forward ports:
    icmp-blocks:
    rich rules:
Add a Firewalld Rule for Webmin
Add the new port number to the active zone, using the permanent option to ensure it survives a system restart, port 10000 is the default Webmin port:
# firewall-cmd --zone=public --add-port=10000/tcp --permanent
success
Reload the rules with reload:
# firewall-cmd --reload
success
Check with list-ports:
# firewall-cmd --zone=public --list-ports
80/tcp 10000/tcp
Add Webmin to the CentOS 6 Firewall
The default iptables settings for the minimal CentOS installation is to only allow SSH traffic (on port 22). The current iptables settings can be listed with the -L command:
# iptables -LAdd the Webmin port, port 10000, which requires editing the iptables rules configuration file using vi and restarting the firewall.
Adding an Iptables Firewall Rule for Webmin Using Vi
Use vi to edit the firewall rules:
# vi /etc/sysconfig/iptablesMove the cursor to the line after the SSH rule and enter insert mode (by pressing i). Enter the new rule -A INPUT -p tcp -m tcp –dport 10000 -j ACCEPT and save the file and quit (using Esc then :wq).
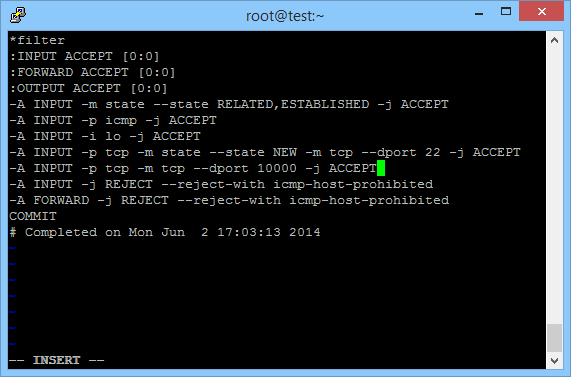
Restart Iptables to Enable the New Webmin Firewall Rule
Issue the command /etc/init.d/iptables restart to apply the new Webmin firewall rule:
# /etc/init.d/iptables restartInstall Webmin Using Yum
Use yum to install Webmin via the configuration file webmin.repo created earlier:
# yum install webmin(The time to install varies on the speed of the Internet connection. Agree to the install when asked with y then Enter.)
Turn Off Webmin SSL Support if not Configured
If the servers SSL configuration has not been completed then the default enabled Webmin SSL setting needs to be disabled. Edit /etc/webmin/miniserv.conf, e.g. with vi:
# vi /etc/webmin/miniserv.confIn vi enter insert mode and change the line ssl=1 to ssl=0.
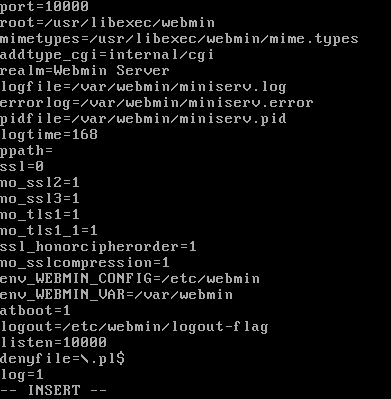
Use the escape (Esc) key then :wq to save the changes and quit vi.
Start Webmin
Issue the command /etc/init.d/webmin start:
# /etc/init.d/webmin startUsing a browser enter the CentOS server's address adding port 10000, e.g. if the CentOS server is called myServer use http://myserver.com:10000. Use the hostname command to find the host name (see further on for access using a local VM):
# hostname
myserver
The Webmin log on page will be displayed.
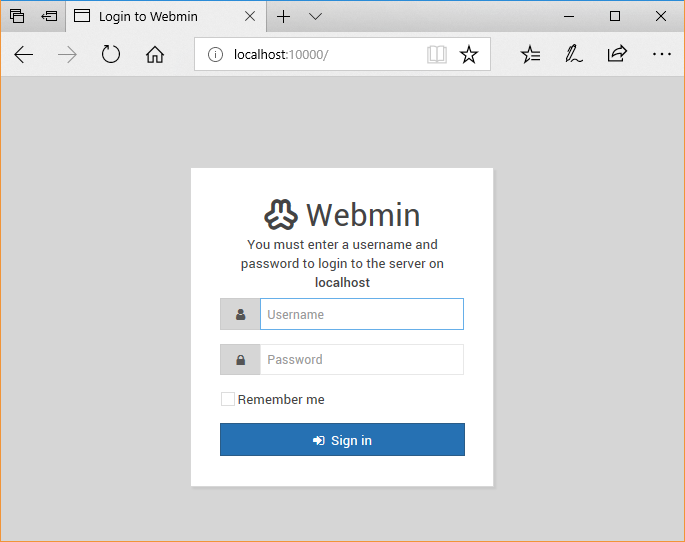
If you see an error message:
Error - Document follows
This web server is running in SSL mode
Check that SSL mode is not enabled initially (see above), if it has been changed from ssl=1 to ssl=0 then restart Webmin:
# /etc/init.d/webmin restartAccess Webmin from Localhost on Local VM using NAT
If the CentOS server is running on a virtual machine (VM) using VirtualBox, the VM will need configuring with a port forwarding rule. Using Network Address Translation (NAT) the localhost port 10000 traffic is forwarded to the VM's port 10000. Using the VirtualBox Manager program select the Settings for the CentOS VM.
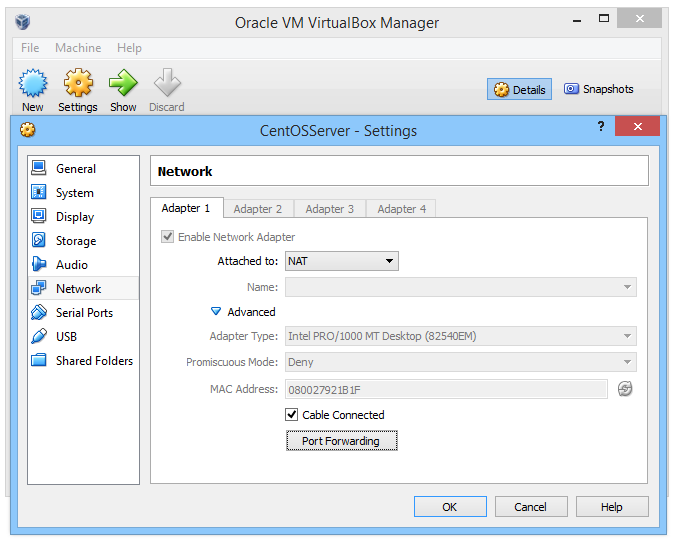
Add a port forwarding rule for TCP to forward Host Port 10000 to Guest Port 10000.
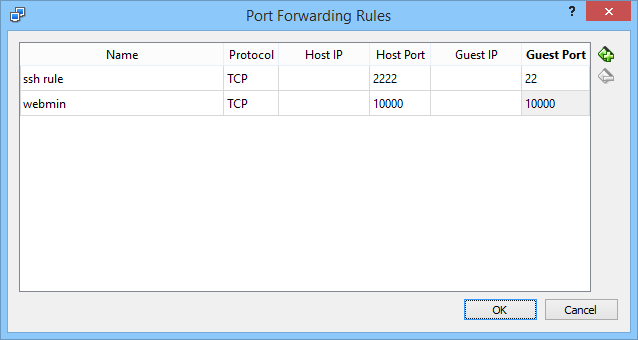
When entering the address localhost:10000 into the browser (http://localhost:10000) it will forward to the correct port on the VirtualBox VM.
Check that Webmin is Running on CentOS
To check that Webmin is running via the SSH terminal use /etc/init.d/webmin status:
# /etc/init.d/webmin status
Webmin (pid 1056) is running
Log In to Webmin Using Default CentOS Root User
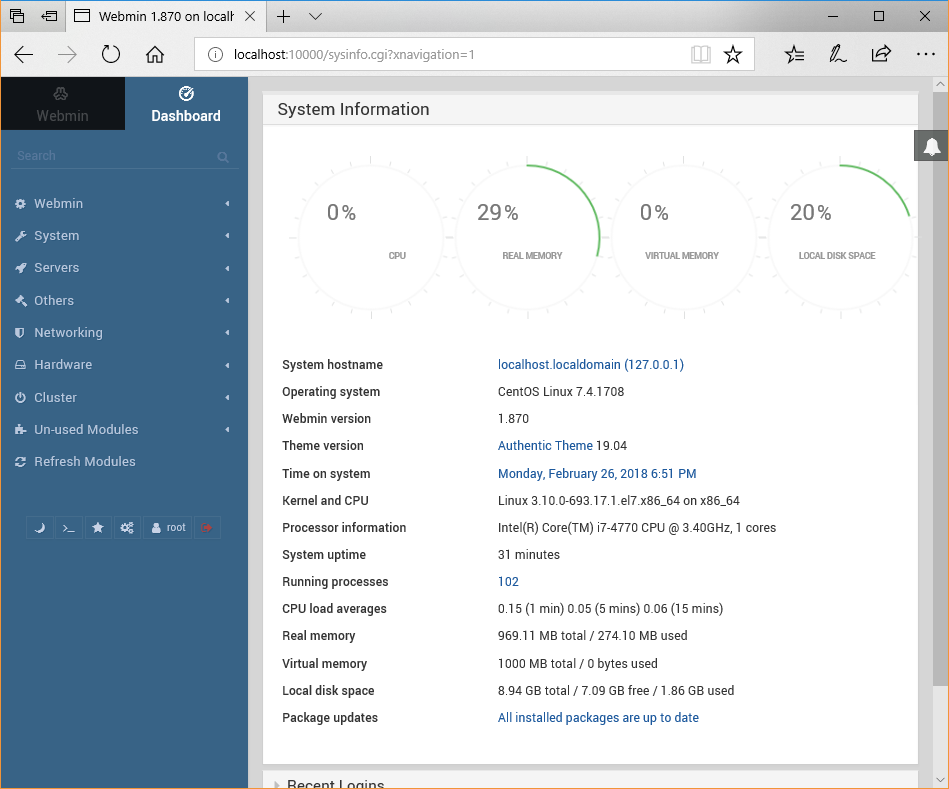
The default log in for Webmin is the same as the default CentOS root user. Log into Webmin. Use the web interface to explore the system administration options available.
See Also
- Virtualization Software for Windows, Run Another OS for Free
- Virtual CentOS on Windows Using VirtualBox to Run the VM
- SSH into VPS Virtual Machine on Windows Using PuTTY
- View related articles on CentOS and Virtual Private Servers (VPS).
- View the Tek Eye full Index for other articles.
Author:Daniel S. Fowler Published: Updated:


