Develop a Website on Windows Using Microsoft WebMatrix
Update: This article is now archived and remains here for information purposes only. This article first appeared in 2015, since then Microsoft has long stopped the development of WebMatrix. As a result, WebMatrix is no longer supported, nor is the standalone installer available. There are links to the standalone installer on the Internet, but you need to ensure that the installer is legitimate and will not install malware, furthermore it is unlikely to work on the latest version of Windows.
WebMatrix is still listed in Microsoft's Web Platform Installer (WebPI), however, it will not install due to the removal of older packages online that are required. Microsoft is using Visual Studio Code (VSC) as the alternative for WebMatrix. Visual Studio Code is not as friendly for new website builders as WebMatrix, but it extremely popular with thousands of add-ons. VSC is being improved upon with each release. It should prove to be a very useful web development tool. Other alternatives to WebMatrix exist, for example Eclipse PDT or the CodeLobster IDE.
The below is only retained for archival purposes only.
If you have a Windows laptop or desktop computer you can get started with website development with free Microsoft tools. One of several free software tools that Microsoft provides is WebMatrix. This contains a HTML editor in an Integrated Development Environment (IDE), and the express version of Internet Information Server (IIS) (a web server used for testing your website). A Windows PC running WebMatrix allows you to develop a website and publish it online, for free, using Microsoft Azure cloud hosting. Microsoft free hosting is for a small number of low volume websites. If the website is successful, generating high traffic, it can be upgraded to a registered domain and paid for high volume Azure hosting. Web sites developed on WebMatrix can also be loaded onto other hosting providers servers, you are not limited to Microsoft Azure.
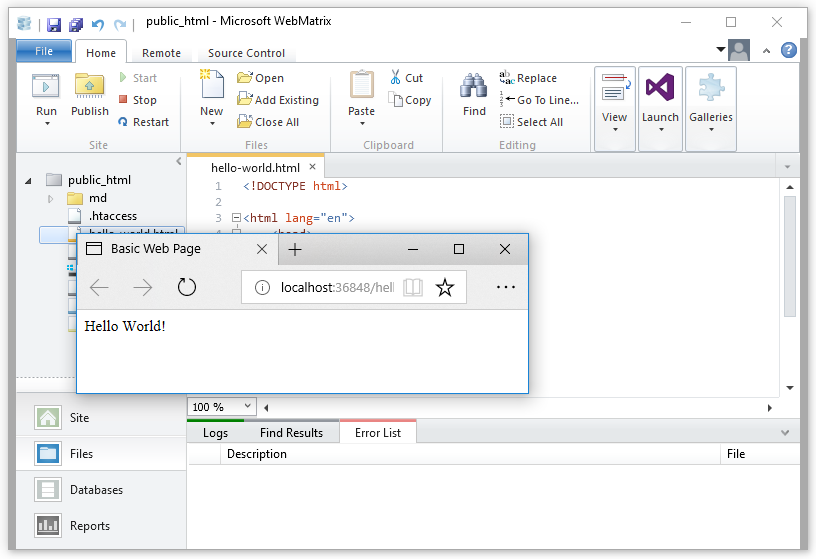
Create a Free Website Online Using WebMatrix, Azure and Microsoft Windows
This tutorial was tested using a Windows 10 PC, but Windows 7, 8 and 8.1 can run WebMatrix. You will need an Internet connection and a Microsoft account to install and run WebMatrix, and to use Microsoft Azure. To set-up WebMatrix on Windows the Microsoft Web Platformer Installer needs to be downloaded first.
Start with the WebPI App
Microsoft WebPI is the easiest way to install common web technologies onto a Windows PC. Start by going to the Microsoft Web Platform Installer home page. At the bottom of the WebPI install page, under Download WebPI, are options for 64-bit Windows (x64), and 32-bit Windows (x86). Choose the download version correct for your Windows device.
(To check which version of Windows you have run the System Information app. Type system in the search box or from the start screen and run System Information. Look at the System Type entry to see if it is a x64 or x32 system.)
Run the installation for the Web Platform Installer. If not logged in as a Computer Admin then the administrator password will be required.
Use WebPI to Install WebMatrix
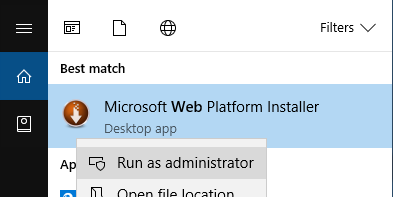
Once installed type Web Platform in the Windows search box and select Microsoft Web Platform Installer. To run WebPI an administrator account is required. For a standard user use the context menu (normally right-click) and select Run as administrator, entering the correct admin password.
In WebPi search for and add WebMatrix (or click on Products and scroll down to Microsoft WebMatrix 3).
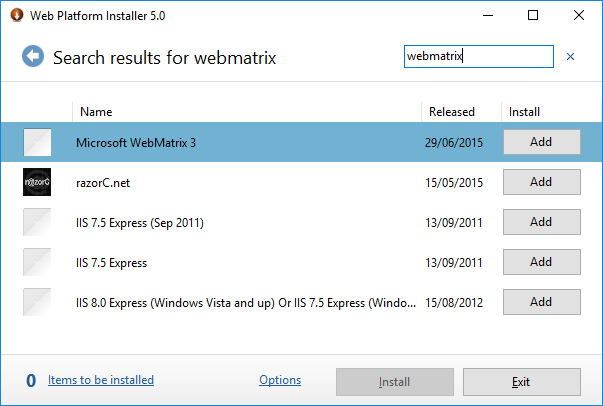
Click Add and then the Install button. You can choose to opt out of the Customer Experience Improvement Program, or change the setting later in the WebMatrix Options. Click I Accept, for the licence terms. WebMatrix and the required components will install. After the progress bars have completed a list of what has been installed will be shown, click the Finish button. At this stage no additional products or applications are required so click the Exit button to close WebPI.
Add WebMatrix to the Windows Start Screen and Taskbar
To make access to WebMatrix easier pin the icon to the taskbar. In the Windows search box, or at the Windows Start screen, type webmatrix. On the WebMatrix icon in the search list use the context menu (usually right-click) and select Pin to taskbar, the option to Pin to Start is also available, do both if required.
Start WebMatrix to Develop a Website on Windows
Run WebMatrix. It works with Microsoft Azure to allow for online deployment and testing of websites that can be accessed from anywhere. A Microsoft account will be required for Azure, which is likely to be the same one used for Windows and other Microsoft services. Sign into Azure with the Microsoft account, though signing in later is possible. When WebMatrix starts the Quick Start screen is displayed.
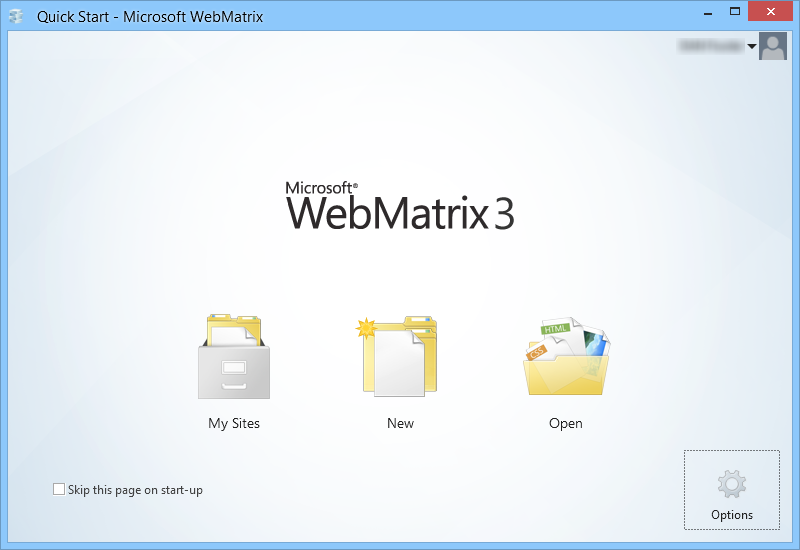
If the same website is always opened, check the Skip this page on start-up option to always edit the last worked on website. (The Quick Start screen is shown again when a website is closed.) By default new websites are created in the My Web Sites folder under user's Documents. This can be set to a OneDrive (formally SkyDrive) folder for easy backup and multi-device synchronising if required. To do so select the Options icon (bottom right of the Quick Start), then the Site option. Change the Default site location to a folder under OneDrive or other cloud service folder. (Don't forget to take regular backups of all work onto other media as well.)
Start by Creating a Blank (Empty) Website
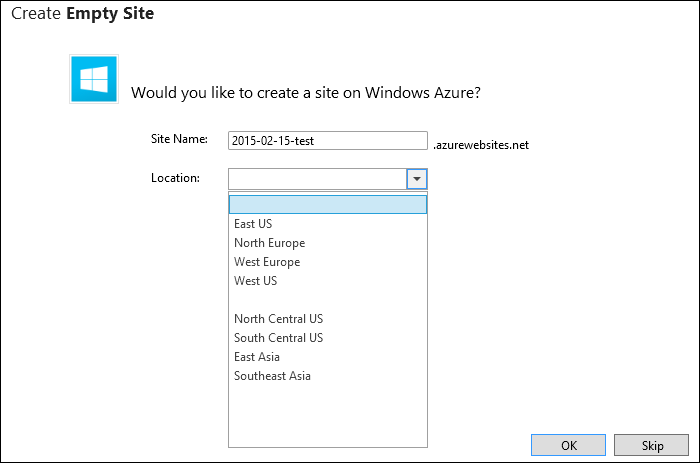
Select the New icon and then Empty Site. A Create Empty Site dialog shows the option to create a site on Windows Azure. Use Azure so websites can be tested online (as well developed on the Windows PC). A website name and Azure location is required. Selecting the Site Name can be difficult because the popular ones are probably taken. However, to start with the name can be a test one, the final name being chosen later. The Site Name will be added to azurewebsites.net to make the live web address (the one typed into a browsers address bar). For example if the Site Name is tekeye then the website's full address is: http://tekeye.azurewebsites.net
(If you find it hard to think of a Site Name try the date of creation in the order of year, month and day, e.g. yyyy-mm-dd. The date allows for an ordered list when viewing all your sites on the PC. Add a relevant word, like test or sandbox, or your name, e.g. John Doe. Use hyphens as separators. A Site Name could be 2015-02-15-test giving http://2015-02-15-test.azurewebsites.net.)
The Azure location should be the closest to where you live, or where your expected website viewers will be based, i.e. from where your main traffic is expected.
The main WebMatrix screen will appear and a provisioning message will display at the bottom. This can be closed, with the x, when the Azure set-up has completed.
(Note: Azure provisioning can be skipped if using other hosting services, or if there is an error.)
For the First Website Try a Simple Web Page
Create a new web page by selecting Create a new file in the middle of the WebMatrix screen or click the New icon in the tool bar.

Select the HTML option for the file type and change the text in the Name box to index.html. Click OK. The web page created for this tutorial is very basic. It is the same as the one for the Hello World in HTML article.
Between the title tags add some text, this text appears on the tab in a web browser. Between the body tags add Hello World! which will be displayed on the web page. The code will look like this:
<!DOCTYPE html>

<html lang="en">
    <head>
        <meta charset="utf-8" />
        <title>Basic Web Page</title>
    </head>
    <body>
Hello World!
    </body>
</html>
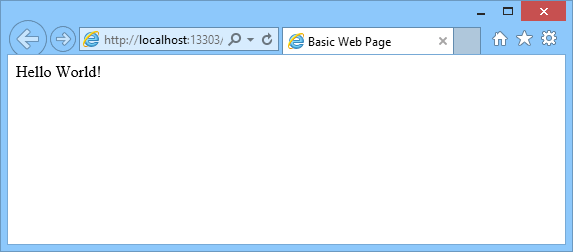
Run the basic web page, click the Run icon on the toolbar. A web browser will load and show Hello World!
Click the publish icon on the toolbar and the website will be sent to Azure. You will need to accept the dialogs that appear by clicking Continue.
The publishing status message will be displayed, when completed click the link to the new website, this time the website is displayed from the Azure cloud.

You are now ready to add more files and more content.
Website Does Not Run
On newer versions of Windows WebMatrix may no longer run the website. On thing to try is to update the webserver WebMatrix uses, IIS Express.
See Also
- Tek Eye has some HTML articles to help new web developers.
- See w3schools.com to learn about HTML and web development.
- View the Tek Eye full Index for other articles.
Author:Daniel S. Fowler Published: Updated:


