Your First Android Java Program - Hello, World!
Getting a computer program to display Hello, World! is traditionally the first program written to test a system. If you are new to writing Java programs for Android and have just installed Android Studio then why not start by running a Hello, World! application, or app as it is now commonly known.

A Tutorial on Building an Android Hello World App
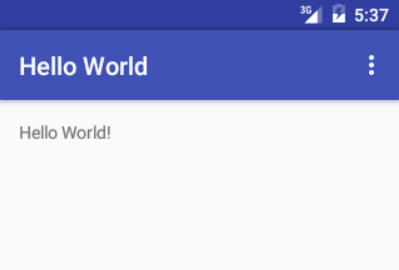
This tutorial walks through a basic Android Hello, World! app. This is done in the Android Studio Integrated Development Environment (IDE) with the Java programming language. Android Studio and Java are supported by Google as a development environment for producing apps. Studio also supports the Kotlin language for building apps.
When an Android app project is created in Studio it gives you the basic Hello World program as a starting point. This tutorial runs through making that first basic Android Hello World app. The article assumes that you have set up and the configured the latest version of Android Studio on your computer ready for development. To do this for a Windows computer see our article Android Studio Windows Install for PCs.
Note: For best productivity Android Studio should be used on a recent computer with a SSD, 8GB or more RAM, and a i3, i5, i7 or Ryzen processor
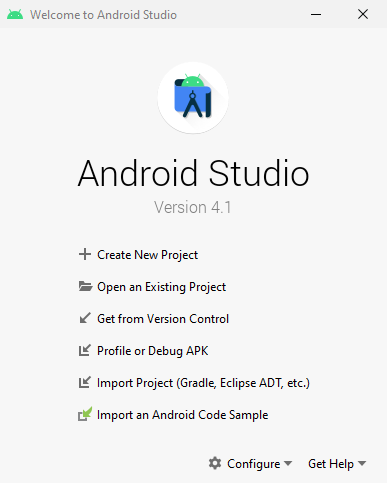
When Android Studio loads select Creat New Project (or use New then New Project from the File menu if an existing project is open).
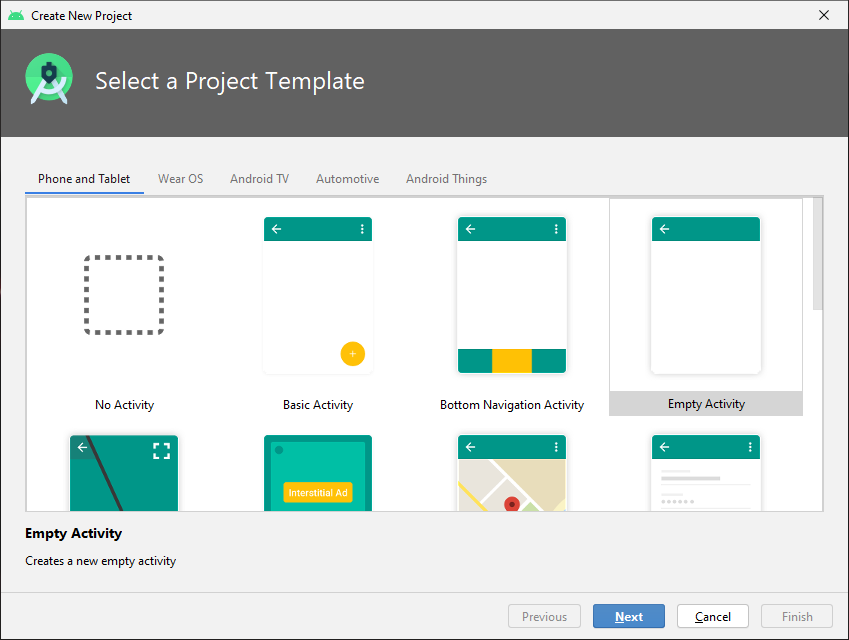
Several types of project are available, for the first simple Hello World app start with the simplest Empty Activity (an Activity is Android speak for a screen or part of a screen).
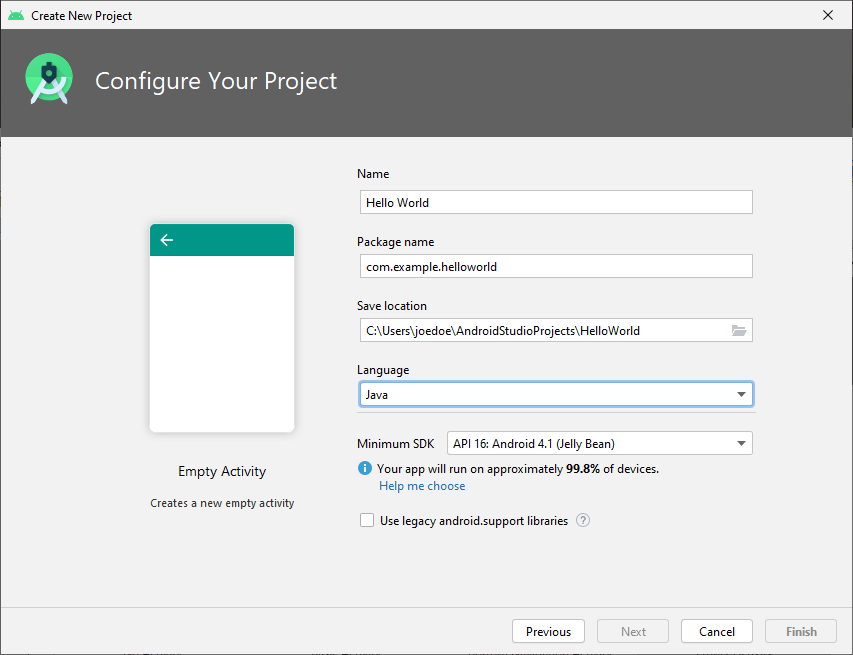
Select Next and fill out the configuration fields on the Create New Project dialog:
- Name - Hello World - the default name seen in the Google Play store and on the device.
- Package name - this defaults to com.example.helloworld. It is based on a reversed domain name, example.com by default, and the app name. Use your own domain name, if you have one, or the url of an online profile page, you will need access to a unique address to publish on Google Play.
- Save location - accept the default or choose a location.
- Language - Android is moving towards Kotlin as a development language, choose Kotlin or Java, here Java is used.
For this simple app, the remaining options can stay as default, i.e. Minimum SDK Level as set, and legacy support libraries unchecked.
Note: Android app projects generate lots of files, ensure the disk for development projects has plenty of free space.
The Importance of Package Names and API Level
Here the Package name will default to com.example.helloworld. The Package Name is important, especially if you intend to publish on the Play store, other app stores, or the Internet. What is the Android Package Name? The Package Name serves as a method to uniquely identify an app publisher, and the different apps from a publisher, e.g. com.example.mycoolapp. This allows Google Play, and all Android devices, to distinguish your application from others.
The recommended way to define a Package Name is to use a web address in reverse, without the http and www parts, followed by an identification string related to the application. Use your company's web site address, or your own domain or web address, e.g. a personal blog address. In this tutorial example.com is kept for the domain name, therefore the Package Name is com.example.helloworld. Thus, com.example becomes a Namespace. The domain namespace will be the first part for all your apps' Package Names, with the last part referencing a particular app. If your blog was example.wordpress.com then the Package Name could be com.wordpress.example.helloworld. Note, do not use com.example, reverse your own domain, e.g. full apps built by this website use uk.tekeye. Plus, organisations producing multiple apps must keep track of the Package Names used, to prevent duplicates.
The Minimun SDK level can be changed if required. API stands for Application Programming Interface, and is the minimum version of Android that the app with run on. Newer APIs have more features but run on fewer devices. Older APIs support a wider set of devices but not all the features of the latest Android Software Development Kit (SDK). The Google Play store no longer supports old devices, e.g. API 9 (Android 2.3 Gingerbread), and some Android API features only work on a later API. Plus, the Studio SDK may issue warning messages for some features on earlier APIs. As a general rule the minimum recommend API to select should match the minimum API supported by Google's advertising AdMob code. At the time of this article's update, the minimum AdMob requirements are Android API 16 (Jelly Bean, version 4.1).
Complete the Create New Project Wizard
Select Finish, Studio will prepare the project and began building the Hello World app. This default simple app runs out-of-the-box to display a Hello World message on the Android screen. If this is the first run of Studio the OpenJDK component (for Java) will require access through the Windows Defender firewall. Allow access and enter the Windows admin password for the User Account Control dialog if not logged in as a Windows administrator.
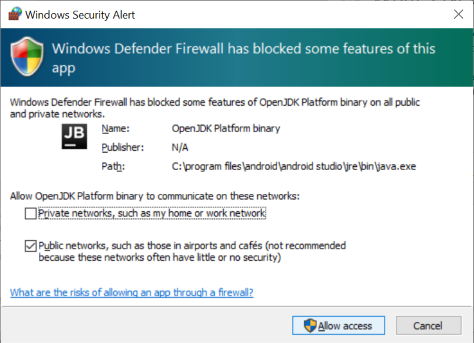
The app will build in Studio, this may take some time, especially if Android Studio is run for the first time. Check the status bar at the bottom of the Android Studio IDE when it appears.

When the app is created the empty Activity will be the first screen, which is shown in Studio as the activity definition file, activity_main.xml, and the code file, MainActivity.java.
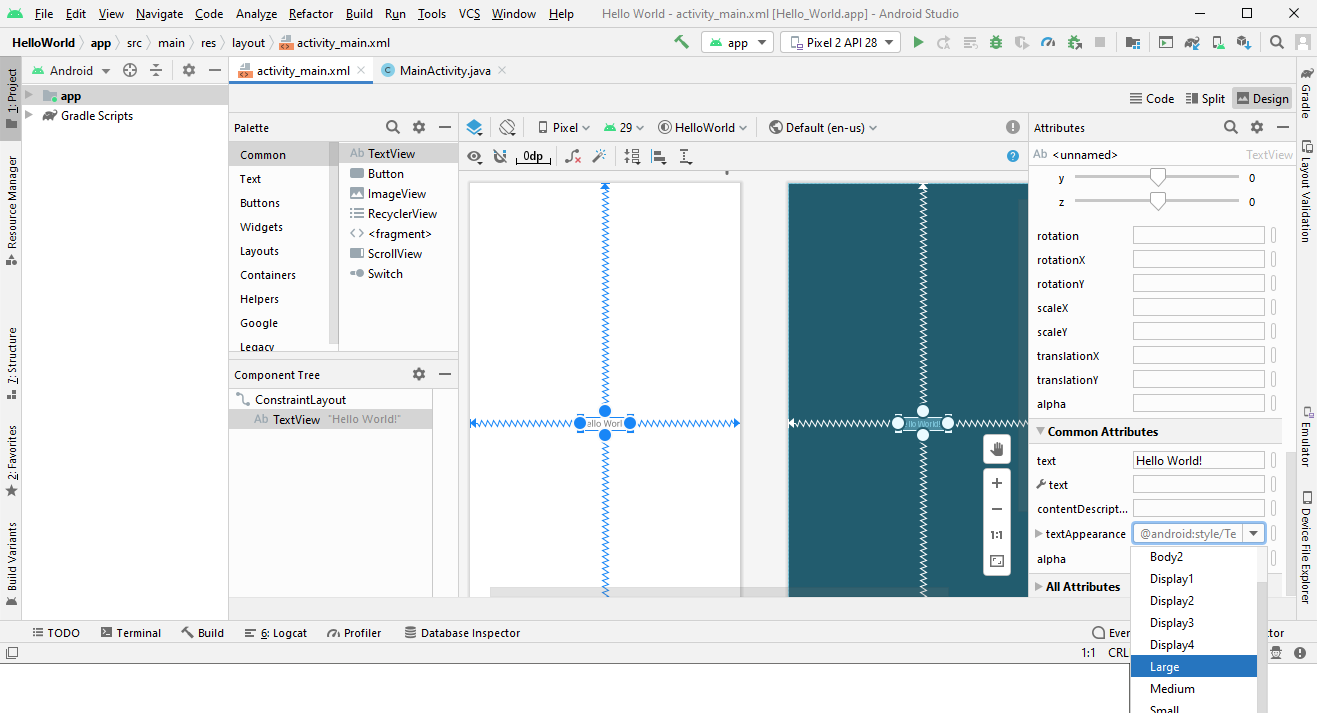
The Hello World project can be explored by clicking on the Project tab on the left of the Studio IDE, view the project tree and use it to open the files. The Java code is under the java folder (see Android Project Structure). Project files can be opened using the the Project explorer. The activity_main.xml is stored in the layout folder under res in the app project tree. To see the XML, click Code towards the top-right to switch between the Design (graphical) and the code views. (If a rendering error occurs when view XML layout files, see the end of the article for a possible workaround.) Tip: To search for a file in a large project, click on the project tree and just start typing the filename.
The Android Studio IDE is divided into several areas. A menu bar and toolbar at the very top, a status bar at the very bottom. Access to various explorers on the far left, a tabbed central editing area, tabs for various utilities below the editing area, and various tabs for assorted tools to the right. Most icons have tool tips so run the mouse around the IDE to see the functions of the various visible items.
Run the Hello World App
The app is ready to be executed on a physcial device or an Android Virtual Device (AVD). To run on a physical Android device, the device must be plugged into the computer with the device drivers installed (on Windows). USB debugging must be enabled on the device, via the Android developer mode options.
Press the green play button (the Run 'app' toolbar button) to execute Hello World. Alternatively, use Shift-F10 or select Run 'app' from the Run menu. Studio will check the build, and, if the AVD was installed, start the virtual device (unless a physical device is selected). If more than one AVD is configured then you may need to choose which one to start.
When an AVD needs to load it can take some time, as the AVD will need to boot up. What if the AVD is running slowly? If the development PC is not of a high specification the AVD may struggle to run. In that case it is recommended to use a real Android device. If the development PC is of a high specification, but the AVD is slow, check that the Intel x86 Atom virtualized emulator, the Hardware Accelerated Execution Manager (HAXM) is installed, and use an x86 AVD image. Alternatively, use a lower level API and smaller screen (e.g. a Nexus One), which requires less CPU and resources. For more information on setting up an AVD, see the article Set Up an Android Virtual Device for App Testing.
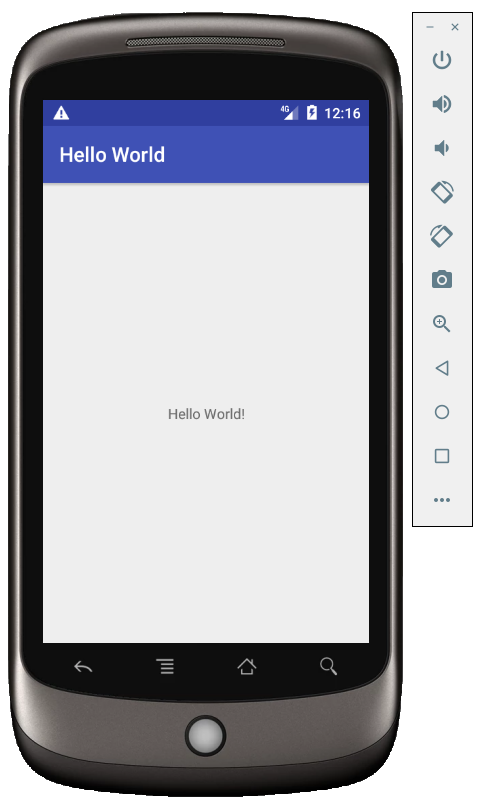
For tips on using the keyboard with the AVD see Android Emulator Key Mapping. Once your first Android Java programming is running try changing the displayed text. Click on the text on the Design screen and use the list of Attributes to modify it. For example, change textAppearance to Large. Try adding additional functionality, see the Android example projects on this website. Investigate Studio's features and become familiar with the IDE.
See Also
- Android Studio Install for Windows
- Set Up an Android Virtual Device for App Testing
- Android Project Structure
- Try our tutorial Start a Second Android Activity from the First.
- Intel Hardware Accelerated Execution Manager, HAXM
- Android Emulator Key Mapping
- The code is available in a zip file, HelloWorld.zip, with an instructions.txt on how to import the project into Studio.
- See the other Android Studio example projects to learn Android app programming.
- For a full list of the articles on Tek Eye see the full site Index
Additional Information
Rendering Problems Error
Occasionally you may see an error message:
Rendering Problems
Missing styles. Is the theme chosen for this layout?
Use the Theme combo box above the layout to choose a different layout, or fix the theme style references.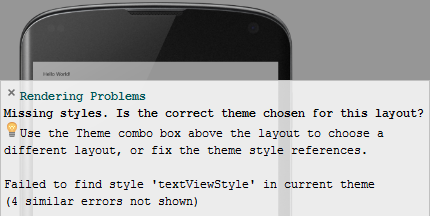
The Studio cache files may need refreshing from the File menu select Invalidate Caches / Restart. Click the Invalidate and Restart button on the message that appears.

Comments
Anonymous on 23 March 2022 said: Great piece of content!... (Remaining comment redacted)
Archived Comments
Alex on 26th Oct. 2021 at 11:07 said: Can you link to us?
Tek Eye on 26th Oct. 2021 at 21:03 said: Please use the email address at the bottom on the page for website queries.
Author:Daniel S. Fowler Published: Updated:


