Email Contact Form in App Using ACTION_SEND Intent
This article is an example on how to send email from an Android app. There are lots of uses for this, here the example is for support and feedback purposes for an app. Developing successful apps requires more than good ideas and good code. You also need to support your users and respond to their questions, suggestions and bug reports. One way is to provide a contact, feedback or suggestion form in your app. Usually accessible from a menu option or button. In this example the first activity is the contact form.

(This Android send email example assumes that Android Studio is installed, a basic App can be created and run, and the code in this article can be correctly copied into Android Studio. The example code can be changed to meet your own requirements. When entering code in Studio add import statements when prompted by pressing Alt-Enter.)
Send Email from Android App Using Intents
One of the advantages of programming with Android is the ability to reuse existing functionality with a few lines of code. The use of an Intent allows the programmer to access other code without directly linking to it. Especially useful in accessing other apps functionalities without directly referencing them, or referencing bulky common libraries. It is achieved via a type of Android internal messaging system, and is a form of declarative programming. This is the case with sending an email from an App. All that is needed is for the app to set up an Intent with the required recipient, subject and text, and hand it over to Android to let the email client do the rest.

Example Contact Form Project
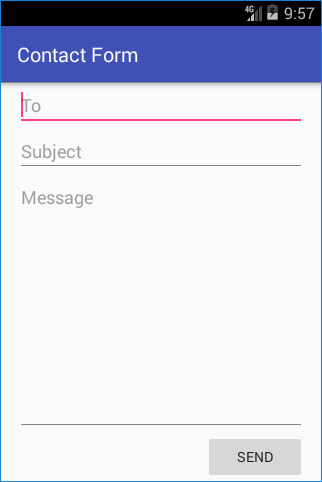
A new app called Contact Form is created in Android Studio using an Empty Activity. An EditText for each field holds the email address, subject title and email content. A Button hands the email over to the device's mail client via an Intent. An example starting layout is shown in the documentation for LinearLayout on Android Developers (see the above picture). For this example replace the code in activity_main.xml in the res/layout folder with the following:
<?xml version="1.0" encoding="utf-8"?>
<LinearLayout xmlns:android="http://schemas.android.com/apk/res/android"
    android:layout_width="match_parent"
    android:layout_height="match_parent"
    android:paddingLeft="16dp"
    android:paddingRight="16dp"
    android:orientation="vertical" >

    <EditText
        android:id="@+id/txtTo"
        android:layout_width="match_parent"
        android:layout_height="wrap_content"
        android:hint="To" />

    <EditText
        android:id="@+id/txtSubject"
        android:layout_width="match_parent"
        android:layout_height="wrap_content"
        android:hint="Subject" />

    <EditText
        android:id="@+id/txtMessage"
        android:layout_width="match_parent"
        android:layout_height="0dp"
        android:layout_weight="1"
        android:gravity="top"
        android:hint="Message" />

    <Button
        android:id="@+id/btnOK"
        android:layout_width="100dp"
        android:layout_height="wrap_content"
        android:layout_gravity="end"
        android:text="Send" />
</LinearLayout>
In the code (in the Java class MainActivity folder) add a listener for the button. In the listener an Intent is created with ACTION_SEND. The Intent is loaded with the address, subject and message text. The type is set to message/rfc822 so only email clients will be interested in handling the Intent. Here's the code:
package com.example.contactform;

import android.content.Intent;
import android.support.v7.app.AppCompatActivity;
import android.os.Bundle;
import android.view.View;
import android.widget.Button;
import android.widget.EditText;

public class MainActivity extends AppCompatActivity {
    @Override
    protected void onCreate(Bundle savedInstanceState) {
        super.onCreate(savedInstanceState);
        setContentView(R.layout.activity_main);

        ((Button) findViewById(R.id.btnOK)).setOnClickListener(new View.OnClickListener() {
            public void onClick(View v) {
                String to = ((EditText)findViewById(R.id.txtTo)).getText().toString();
                String sub = ((EditText)findViewById(R.id.txtSubject)).getText().toString();
                String mess = ((EditText)findViewById(R.id.txtMessage)).getText().toString();
                Intent mail = new Intent(Intent.ACTION_SEND);
                mail.putExtra(Intent.EXTRA_EMAIL,new String[]{to});
                mail.putExtra(Intent.EXTRA_SUBJECT, sub);
                mail.putExtra(Intent.EXTRA_TEXT, mess);
                mail.setType("message/rfc822");
                startActivity(Intent.createChooser(mail, "Send email via:"));
            }
        });
    }
}
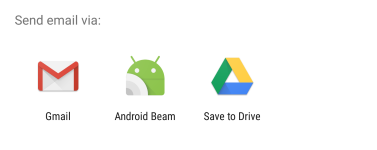
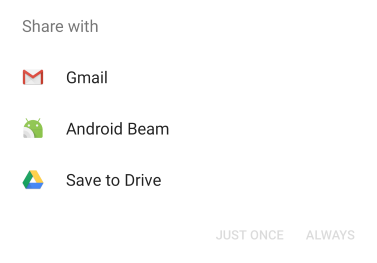
When the button is pressed and more than one application is on the device that can handle sending email you'll be offered a choice:

The static function createChooser was used so that all email apps are listed each time. If just startActivity(mail); was called an option to always use a specific email App is presented.

The email can be tweaked in the email app before sending it on its way. When testing the code using a physical device instead of an emulator (the AVD, Android Virtual Device) is good. A physical device usually has an account setup for emailing. The example send email project code developed in this tutorial is available in send-email-example.zip, it includes instructions for importing into Studio. Alternatively see the brief instructions on the Android Example Projects page.
Improving the Contact Form
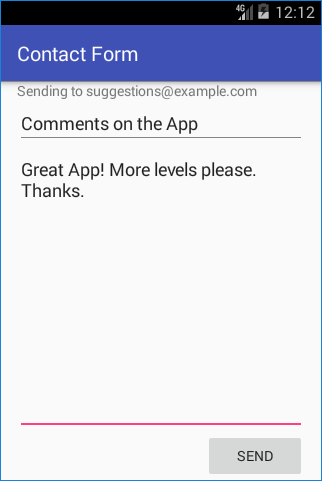
It is unlikely the email address needs to change. A default can be used which saves on one EditText, just let the user know they will be sending via email. Likewise the subject could be preset with the name of the App. These changes would result in a simpler screen:

If required the email Intent also supports CC (Carbon Copy) and BCC (Blind Carbon Copy) using EXTRA_CC and EXTRA_BCC:
mail.putExtra(Intent.EXTRA_CC, new String[]{"someoneelse@example.com"});
mail.putExtra(Intent.EXTRA_BCC, new String[]{"someonesecret@example.com"});
The user could be given fields to enter the CC and BCC address or they could be set to default values.
See Also
- The article About Box for an Android App to see how
Linkifycan be used to make an email address clickable. - Download the code for this example, available in send-email-example.zip
- For more code to try in Studio see the Android Example Projects page.
- For a full list of all the articles in Tek Eye see the full site Index.
Published: Updated:


