Sometimes a Phone Call is Easiest and Quickest
The Internet is a fantastic tool. All that information instantly available, so many online shops and suppliers you can find anything you need 24 hours a day. You get used to using it all the time, yet it isn't the fount of all knowledge.
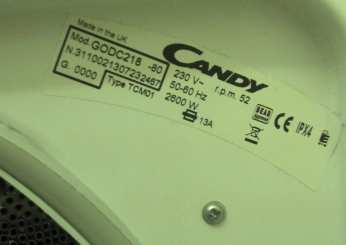
Our Candy GO tumble dryer began playing up, on pressing the button to start it, it occassionally wouldn't work, then it would. The tumble dryer would start but not stay on. It got progressively worse. If I held the start button it would go, but I have better things to do than stand and wait for clothes to dry. So, what to do when my dryer won't start when I push the start button? An interweb search suggested that a printed circuit board (PCB) in the dryer would need replacing. Worth trying to replace it before using the more expensive options (engineer, new dryer). Another search and...no joy. Could not find the part. Our tumble dryer is a Candy GO, the sticker behind the door gave the model number as GODC218-80 (the serial number started 31100213 etc. which, apparently can help when looking for parts). Spent awhile online trying to hunt it down. What doesn't help is that it is listed by parts suppliers under different names: relay PCB, starter relay, dryer PCB, start relay, or just a part number.
espares listed a relay PCB, but it didn't mention/have my model number. The same for TD Spares. Came close at C&M Domestic Appliances (no longer online) for a GOC218-80, close, but just missing the D from the model number. But would it work? At least I could add a part number 91201247 to my search efforts, resulting in a couple of Ebay and Amazon hits as well, but my Candy dryer model was still not listed.
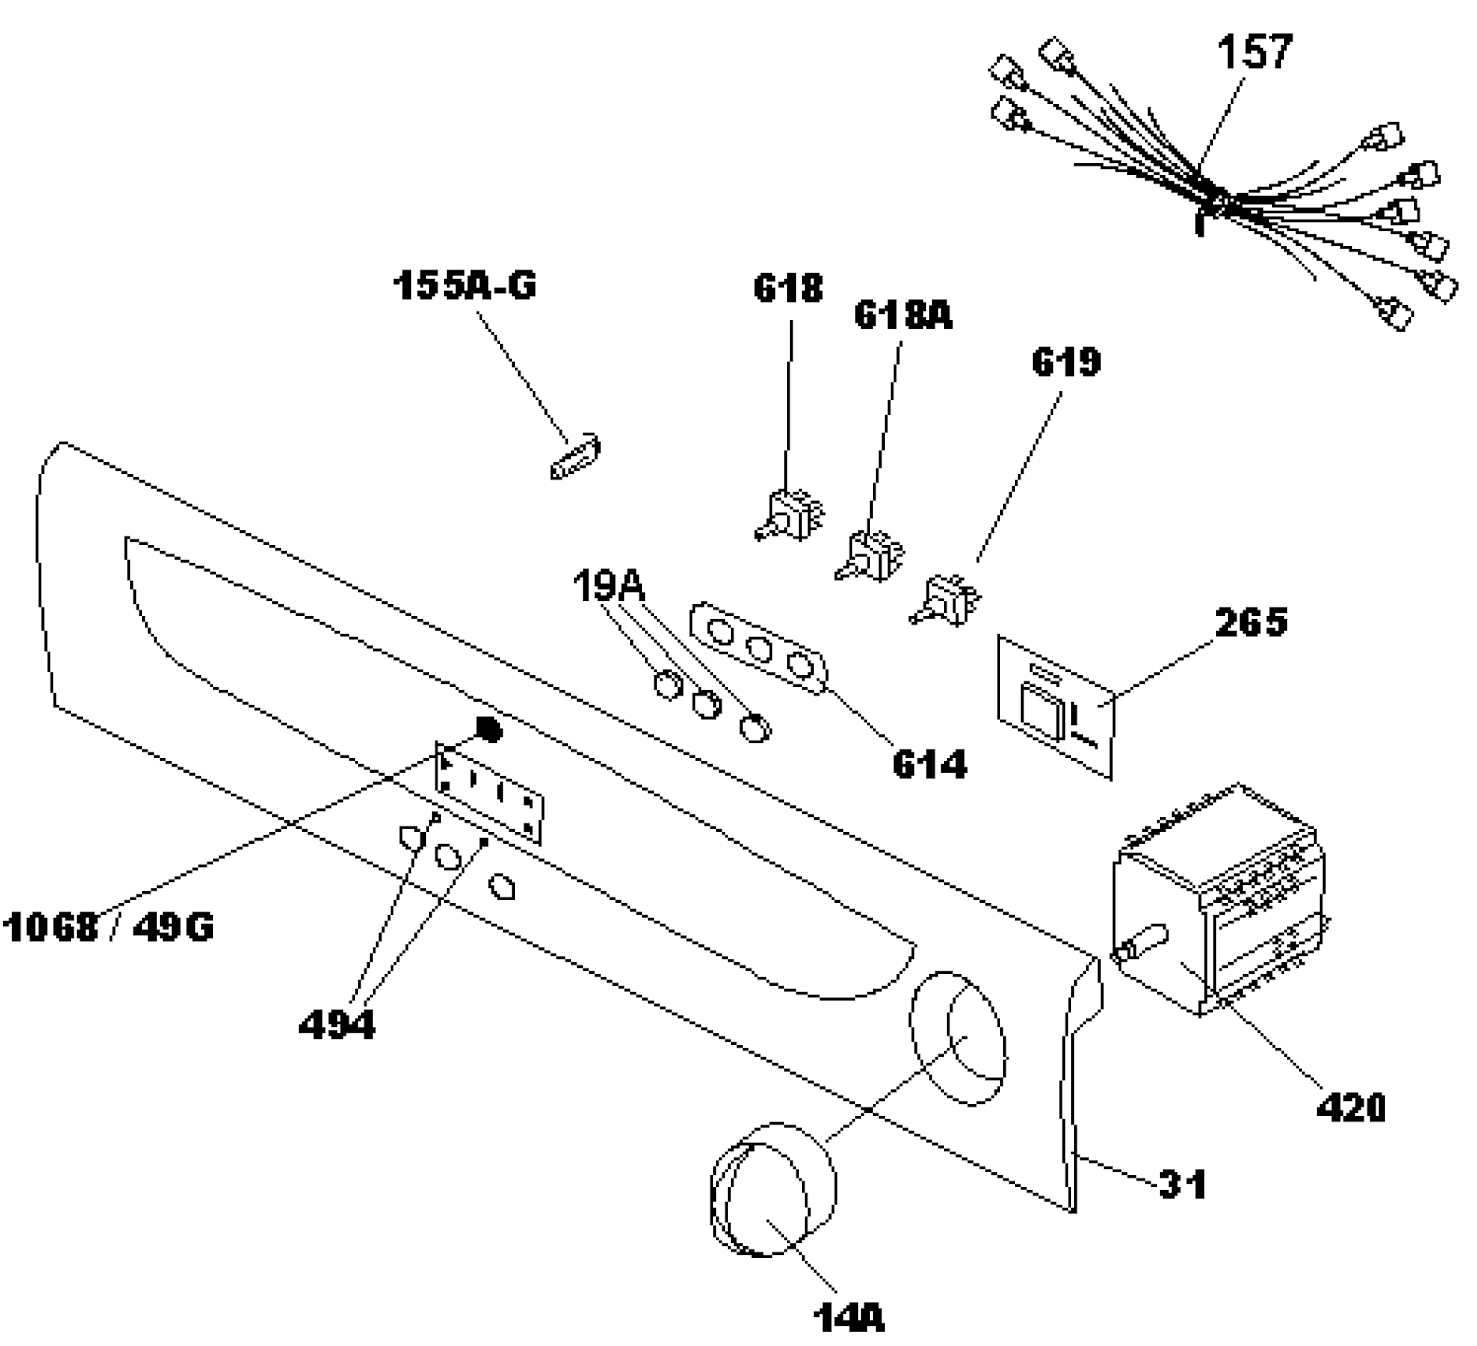
At buyspares they sell a Hoover Relay PCB. I even got a drawing to look at, though I had to use the menus and model number links to get to it:

But again for a GOC218-80, not a GODC218-80, and this has an extra button on the front compared to my dryer, so would the PCB work? I think it would. Or should I open up the dryer and get a part number of the PCB (but I only really want to get the screwdrivers out once). I decided to send a a few emails to the parts suppliers to check before ordering as I didn't want to phone the Candy After Sales Service (it was late in the afternoon and experience tells me that phoning companies from lunchtime onwards often means sitting in a queue).
Got an email back from a supplier asking I check the model number. Well I couldn't have made a mistake as I had snapped it with my phone:

I called the Candy parts line, 08443 712758 (update: Maybe out of date by now), got the part ordered within a couple of minutes! At £21.50 including postage probably a little cheaper elsewhere (update: they are now quite expensive), but at least I know it should work. Apparently a GODC218 comes up as a GOC218 when the serial number is entered into their system! Our serial number starts with 31100213.
Note to self, use the phone more often.
Update: The part duly arrived by courier from Candy and it was the same one widely available with the number 91201247 on a label on the PCB (as well as WE314001G), so it is the relay board that is widely available made by ITW Ispracontrols! Could have saved a few pounds. Worked a treat.
Whilst searching for the part the espares site had some fitting notes posted by a Tim York, I followed them but they were not entirely accurate so my edited version appears here:
Unplug dryer from mains before starting work
- Remove three screws from back top of dryer holding lid in place. Put all removed screws somewhere safe.
- Slide lid back about an inch and lift to remove. NB: Plastic edging strips may not be attached to wooden lid panel, so be careful when removing.
- Remove control knob from front panel. This can just be pulled off, but may require the use of a large flat blade screwdriver to prise it loose.
- Remove two screws from top front edges of dryer holding plastic fascia in place.
- Slide plastic fascia panel slightly right (as you face the front of the dryer) and then pull to remove.
- Use some string to support the front panel while working (tie it to the dryer).
- With the front door fully open remove pull out the sealing strip. Remove the four screws for the metal front of the dryer.
- Gently pull front panel forwards to provide enough clearance to reveal screws holding relay PCB in place. Remove PCB.
- Taking careful note of current position, transfer one wire at a time from old to new PCB.
- Secure new PCB using original two screws.
- Reposition metal front panel back refit screws.
- Replace seal (it just needs pushing back in all around).
- Replace plastic fascia panel taking note to line up all plastic lugs (including one near the top of the panel). Refit two screws to top edges.
- Refit lid and secure with screws.
See Also
- For a full list of all the articles in Tek Eye see the full site Index
Author:Daniel S. Fowler Published:


