Installing DotNet Core on Windows
Update: DotNet Core is now simply .NET. At one point there were two versions of .NET. There was the .NET Framework for Windows machines, and DotNet Core (or .NET Core) to support cross platform development. Now there is simply .NET for all platforms. Therefore, this article is archived, some of the information may still be valid, however, go to the Microsoft .NET download page for the latest version of .NET.
If you need to write apps for multiple platforms one solution is to use .NET. Originally, .NET was restricted to Microsoft technologies but has now been open sourced and caters for multiple platforms. Much like C source code, programs written for .NET can be run across different operating systems using .NET Core as the foundation, supporting Windows, Linux, Android, macOS, and WebAssembly. The most popular language for .NET is C#, (pronounced C sharp), a C-style language. However, other languages can be used, e.g. C++ and Visual Basic.
The .NET platform started life as the .NET Framework, which comes with Microsoft Windows. Now .NET Core is taking over from the .NET Framework as the preferred target for .NET apps. This article covers installing .NET Core onto Windows.
Go to the .NET Core download page and select the latest version. Choose the SDK download for your operating system, x64 for 64-bit Windows, or x86 for 32-bit Windows.
To see if your version of Windows is 64-bit or 32-bit type About in the search box and select About your PC. See System type, e.g. it will say 32-bit or 64-bit operating system. Alternatively, run the System Information App and look for the System Type line (e.g. set to x64-based PC for a 64-bit Windows).
Note: You need administrator access to install .NET Core.
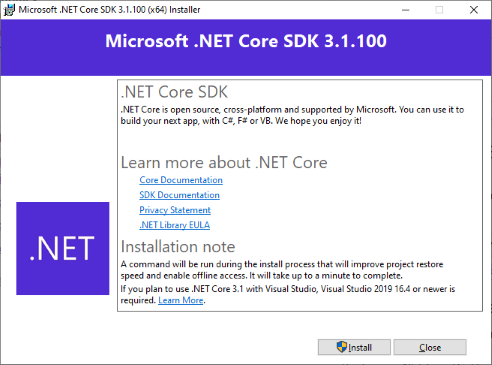
Run the .NET Core installer download, select the Install button, and, if not signed on as the machine administrator, enter the admin password. Click close when it has finished.
Once installed open a Command Prompt (type cmd in the Windows search box). Enter dotnet at the prompt and you will see some options, use dotnet -h for further help.

Run a Hello World Program on .NET Core
It is traditional to run a Hello, World! program to check basic functioning of a system. With the cmd window open, run the .NET Core command that generates a new console app:
dotnet new console -o HelloWorldThis will create a HelloWorld directory and the files for an Hello World console app.

Change to the HelloWorld directory and list the files. The Program.cs file will contain:
using System;

namespace HelloWorld
{
    class Program
    {
        static void Main(string[] args)
        {
            Console.WriteLine("Hello World!");
        }
    }
}
Next use .Net Core to run the program:
dotnet run
Notice how the object file and binary directories have been created. See the Microsoft .NET documentation to learn more about .NET.
See Also
- What is .NET?
- .NET documentation at Microsoft
- A simple way to use .NET is via Visual Studo Code, see Visual Studio Code Quick Windows Install Using Zip File
- For a full list of the articles on Tek Eye see the website's index.
Author:Daniel S. Fowler Published: Updated:


