How to Send Emails in Lovable Using Mailtrap
In this tutorial, I'll walk you through integrating email sending into your Lovable applications using Mailtrap, an email-sending solution for developer and product teams. Mailtrap is focused on fast delivery and high inboxing rates for transactional and promo emails, and provides a highly customizable API and 24/7 tech support.
Before we dive in, ensure you have these prerequisites:
- Sign up for Lovable if you haven't already.
- Get your free Mailtrap account and verify your sending domain.
- We'll use Supabase to safely store our credentials and manage our user database.
In this article:
- Setting up Mailtrap
- Prompt for: Sending emails with Mailtrap
- Prompt for: Contact management with Mailtrap
- Lovable and Mailtrap Integration example
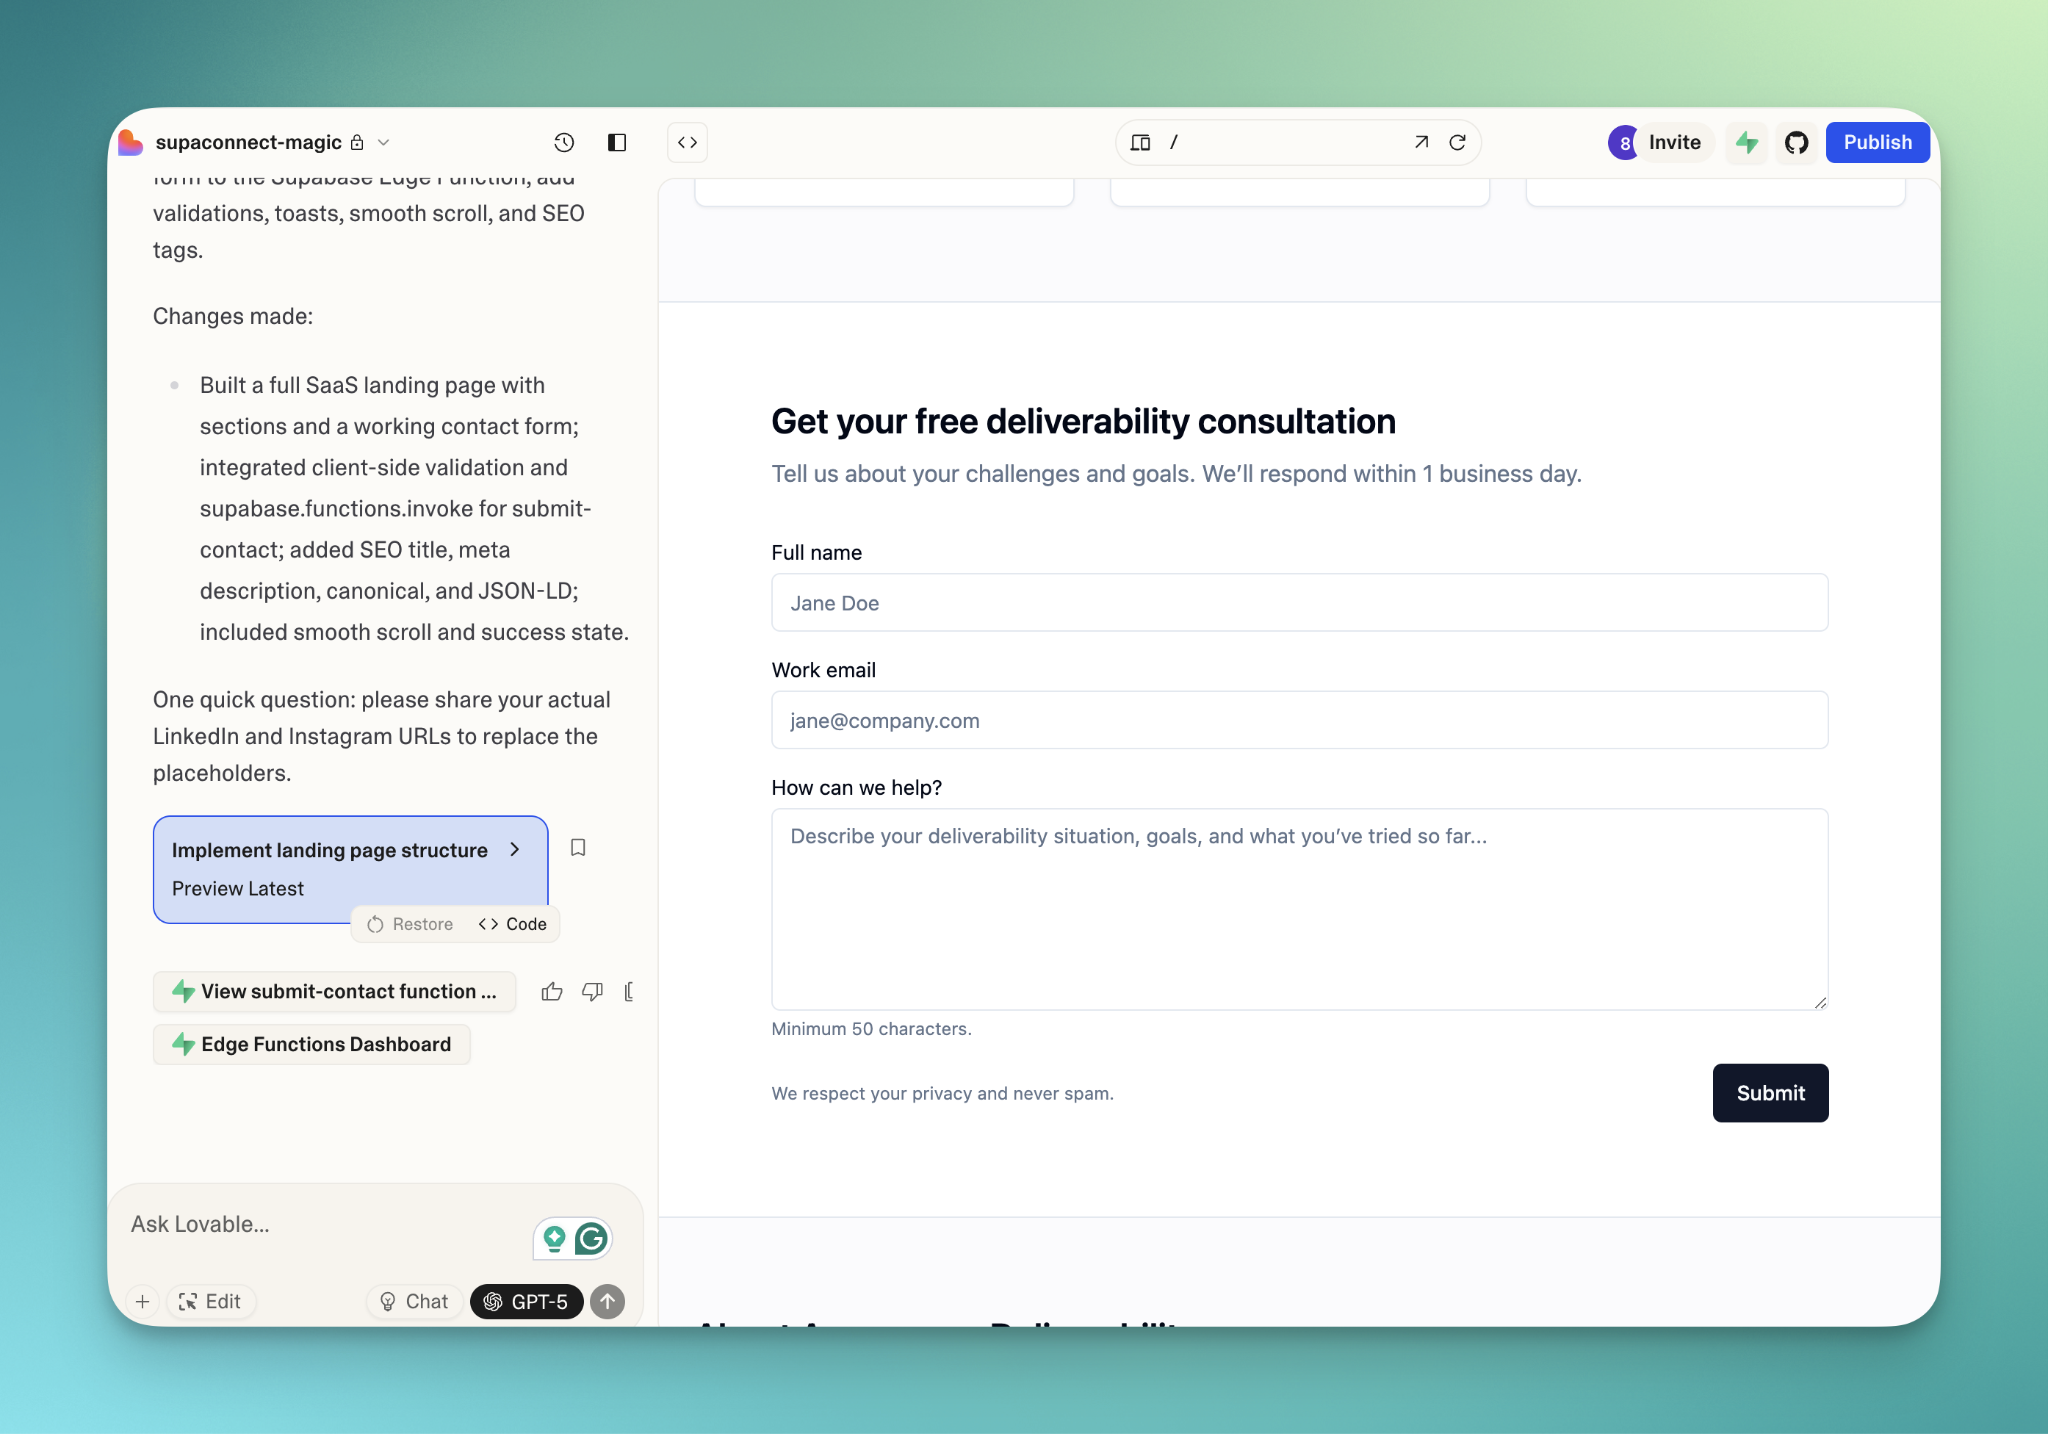
- Creating a contact form
- Adding Mailtrap credentials
- Connecting a Lovable project to Supabase
- Testing project setup
- Lovable email sending best practices
- Advanced: email sending scaling
Disclaimer: Feel free to adjust your prompts to your needs. It might be different for you since Lovable and LLM models constantly evolve.
Set up Mailtrap
Step 1: Configure your Mailtrap domain
If you haven’t already set up a domain, you’ll need to do it before we start - it takes ~5 minutes, and you can use our step-by-step article as a guide.
Navigate to your Mailtrap dashboard and:
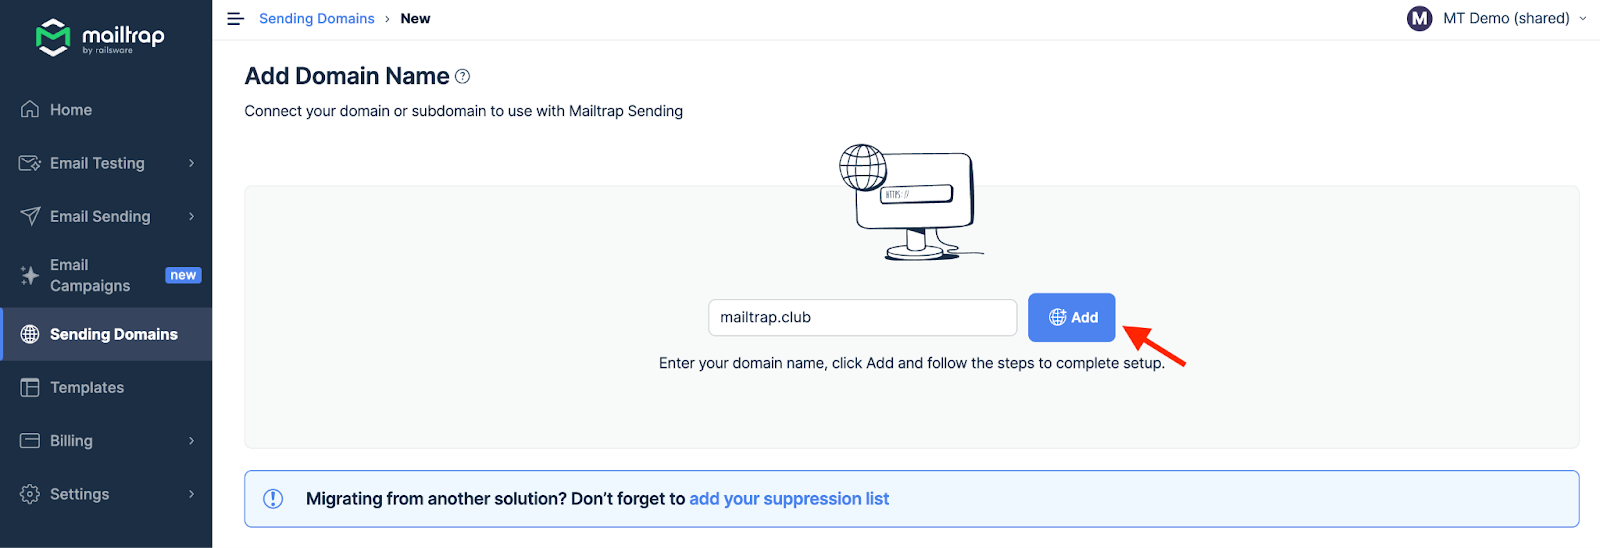
- Go to Sending Domains and click Add Domain.
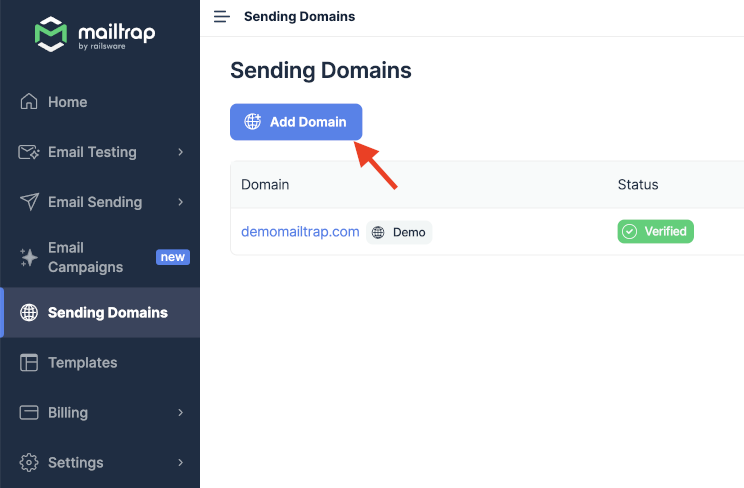
- Enter your domain (e.g., yourapp.com).
- Add the DNS records Mailtrap provides to your domain registrar.
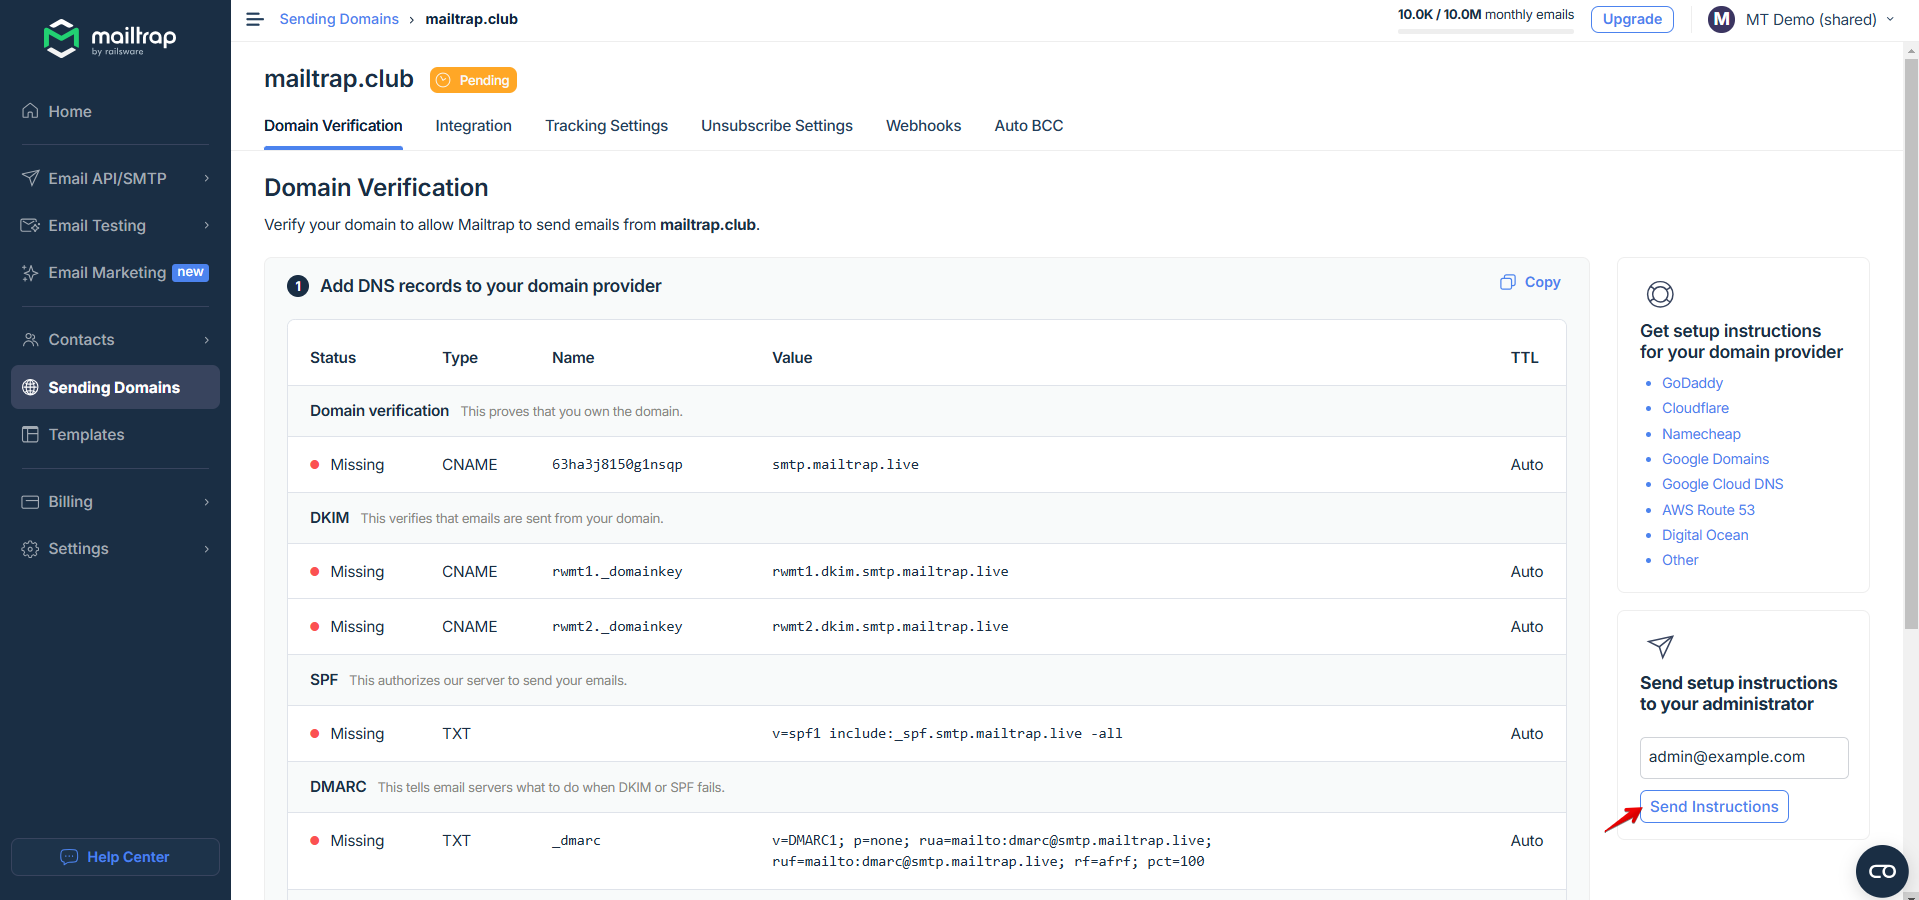
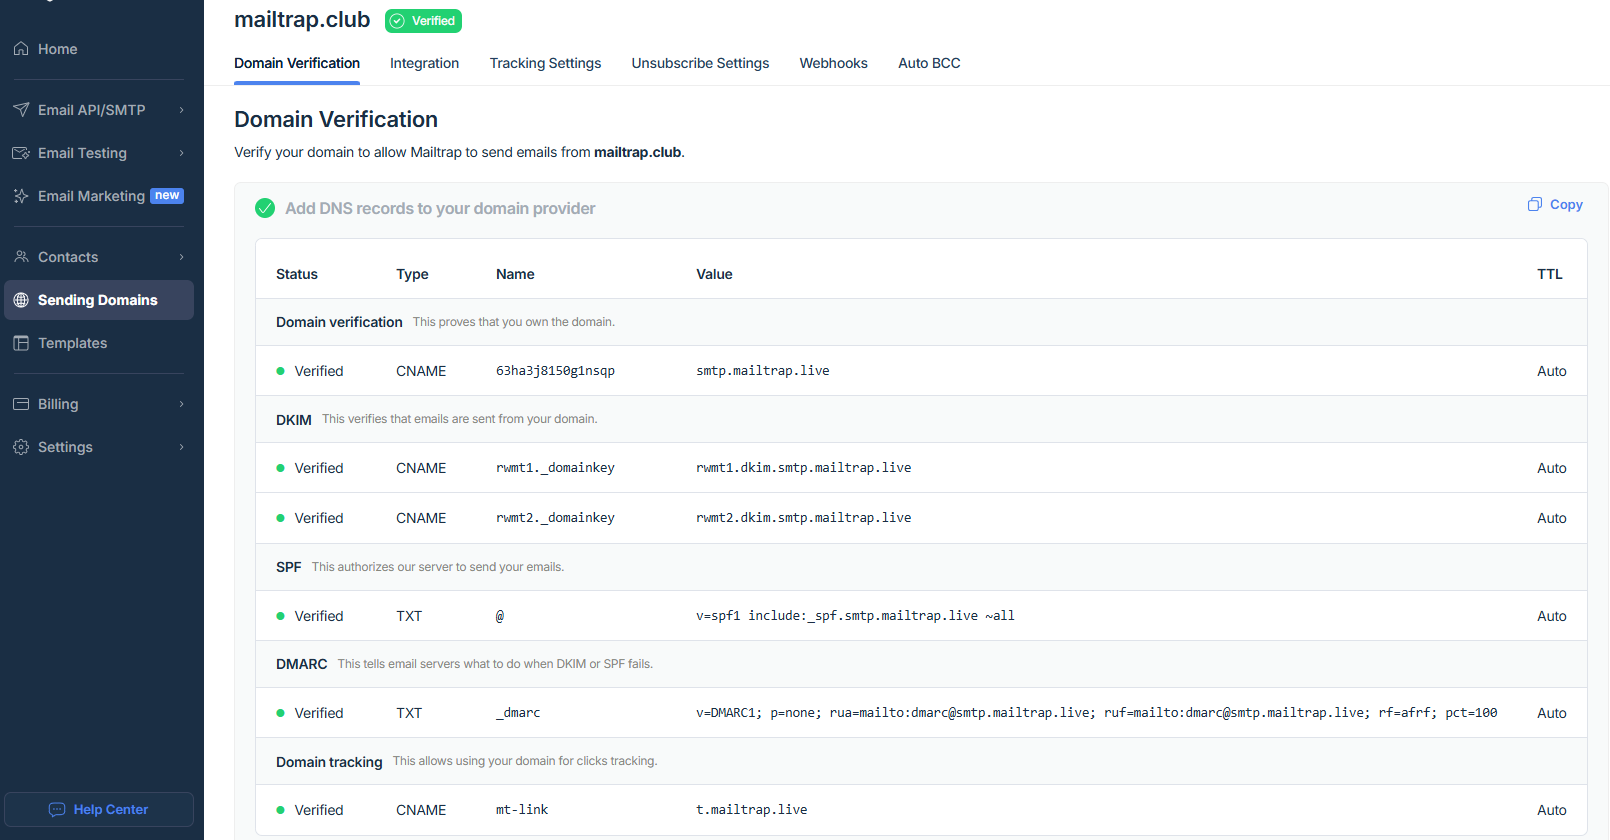
- Wait for verification until you see ‘Verified’ status next to your domain (usually 10-15 minutes).
Step 2: Gather your Mailtrap credentials
To start sending emails from your Lovable project, you’ll need the following:
- API Token - Found in Settings > API Tokens.
- If you’re feeling stuck, click here for a quick guide.
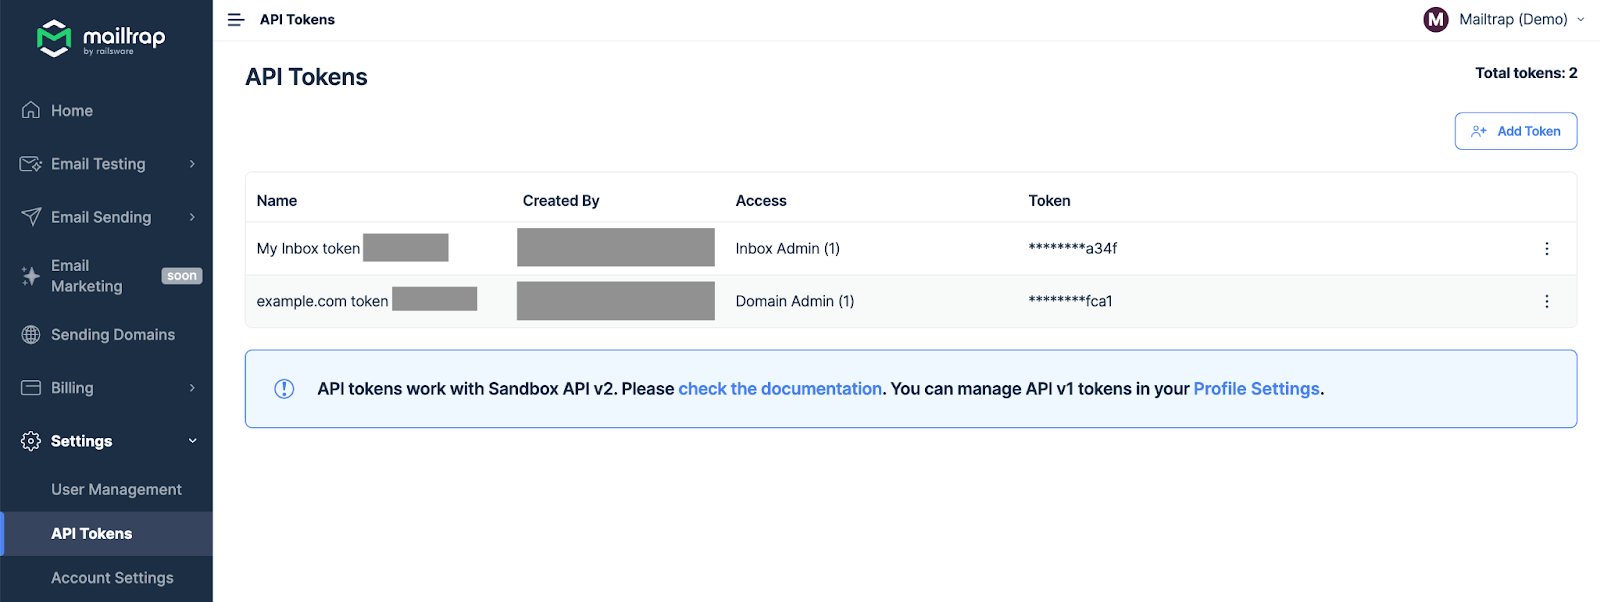
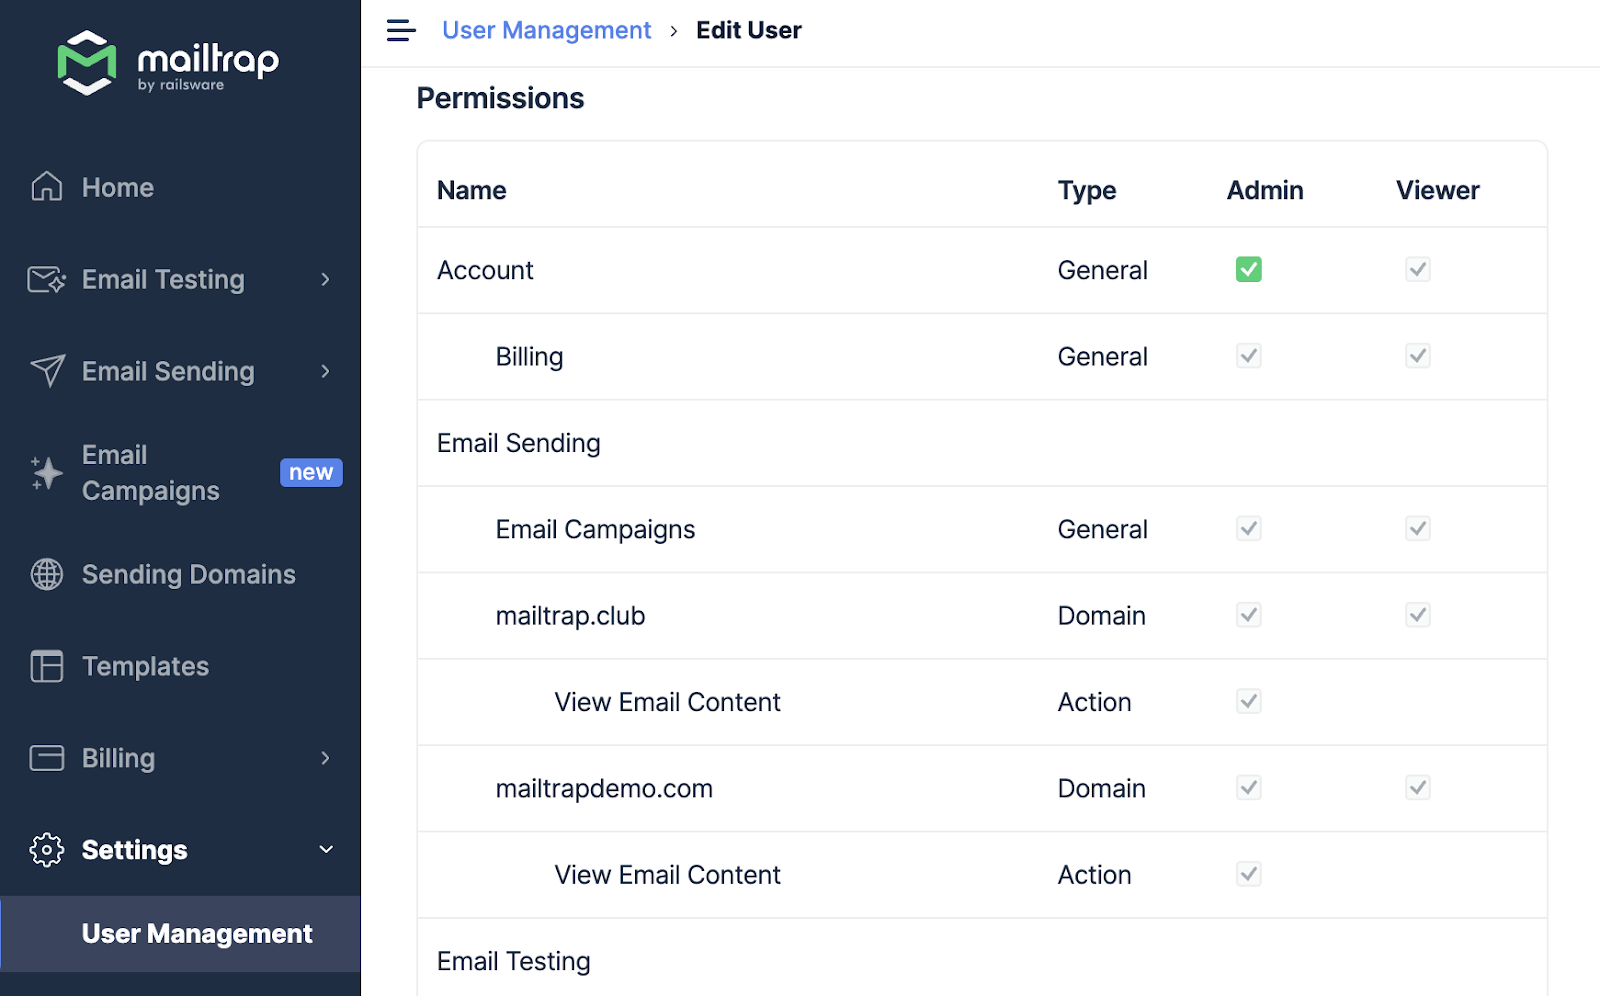
Additionally, ensure you have admin access for your API token.
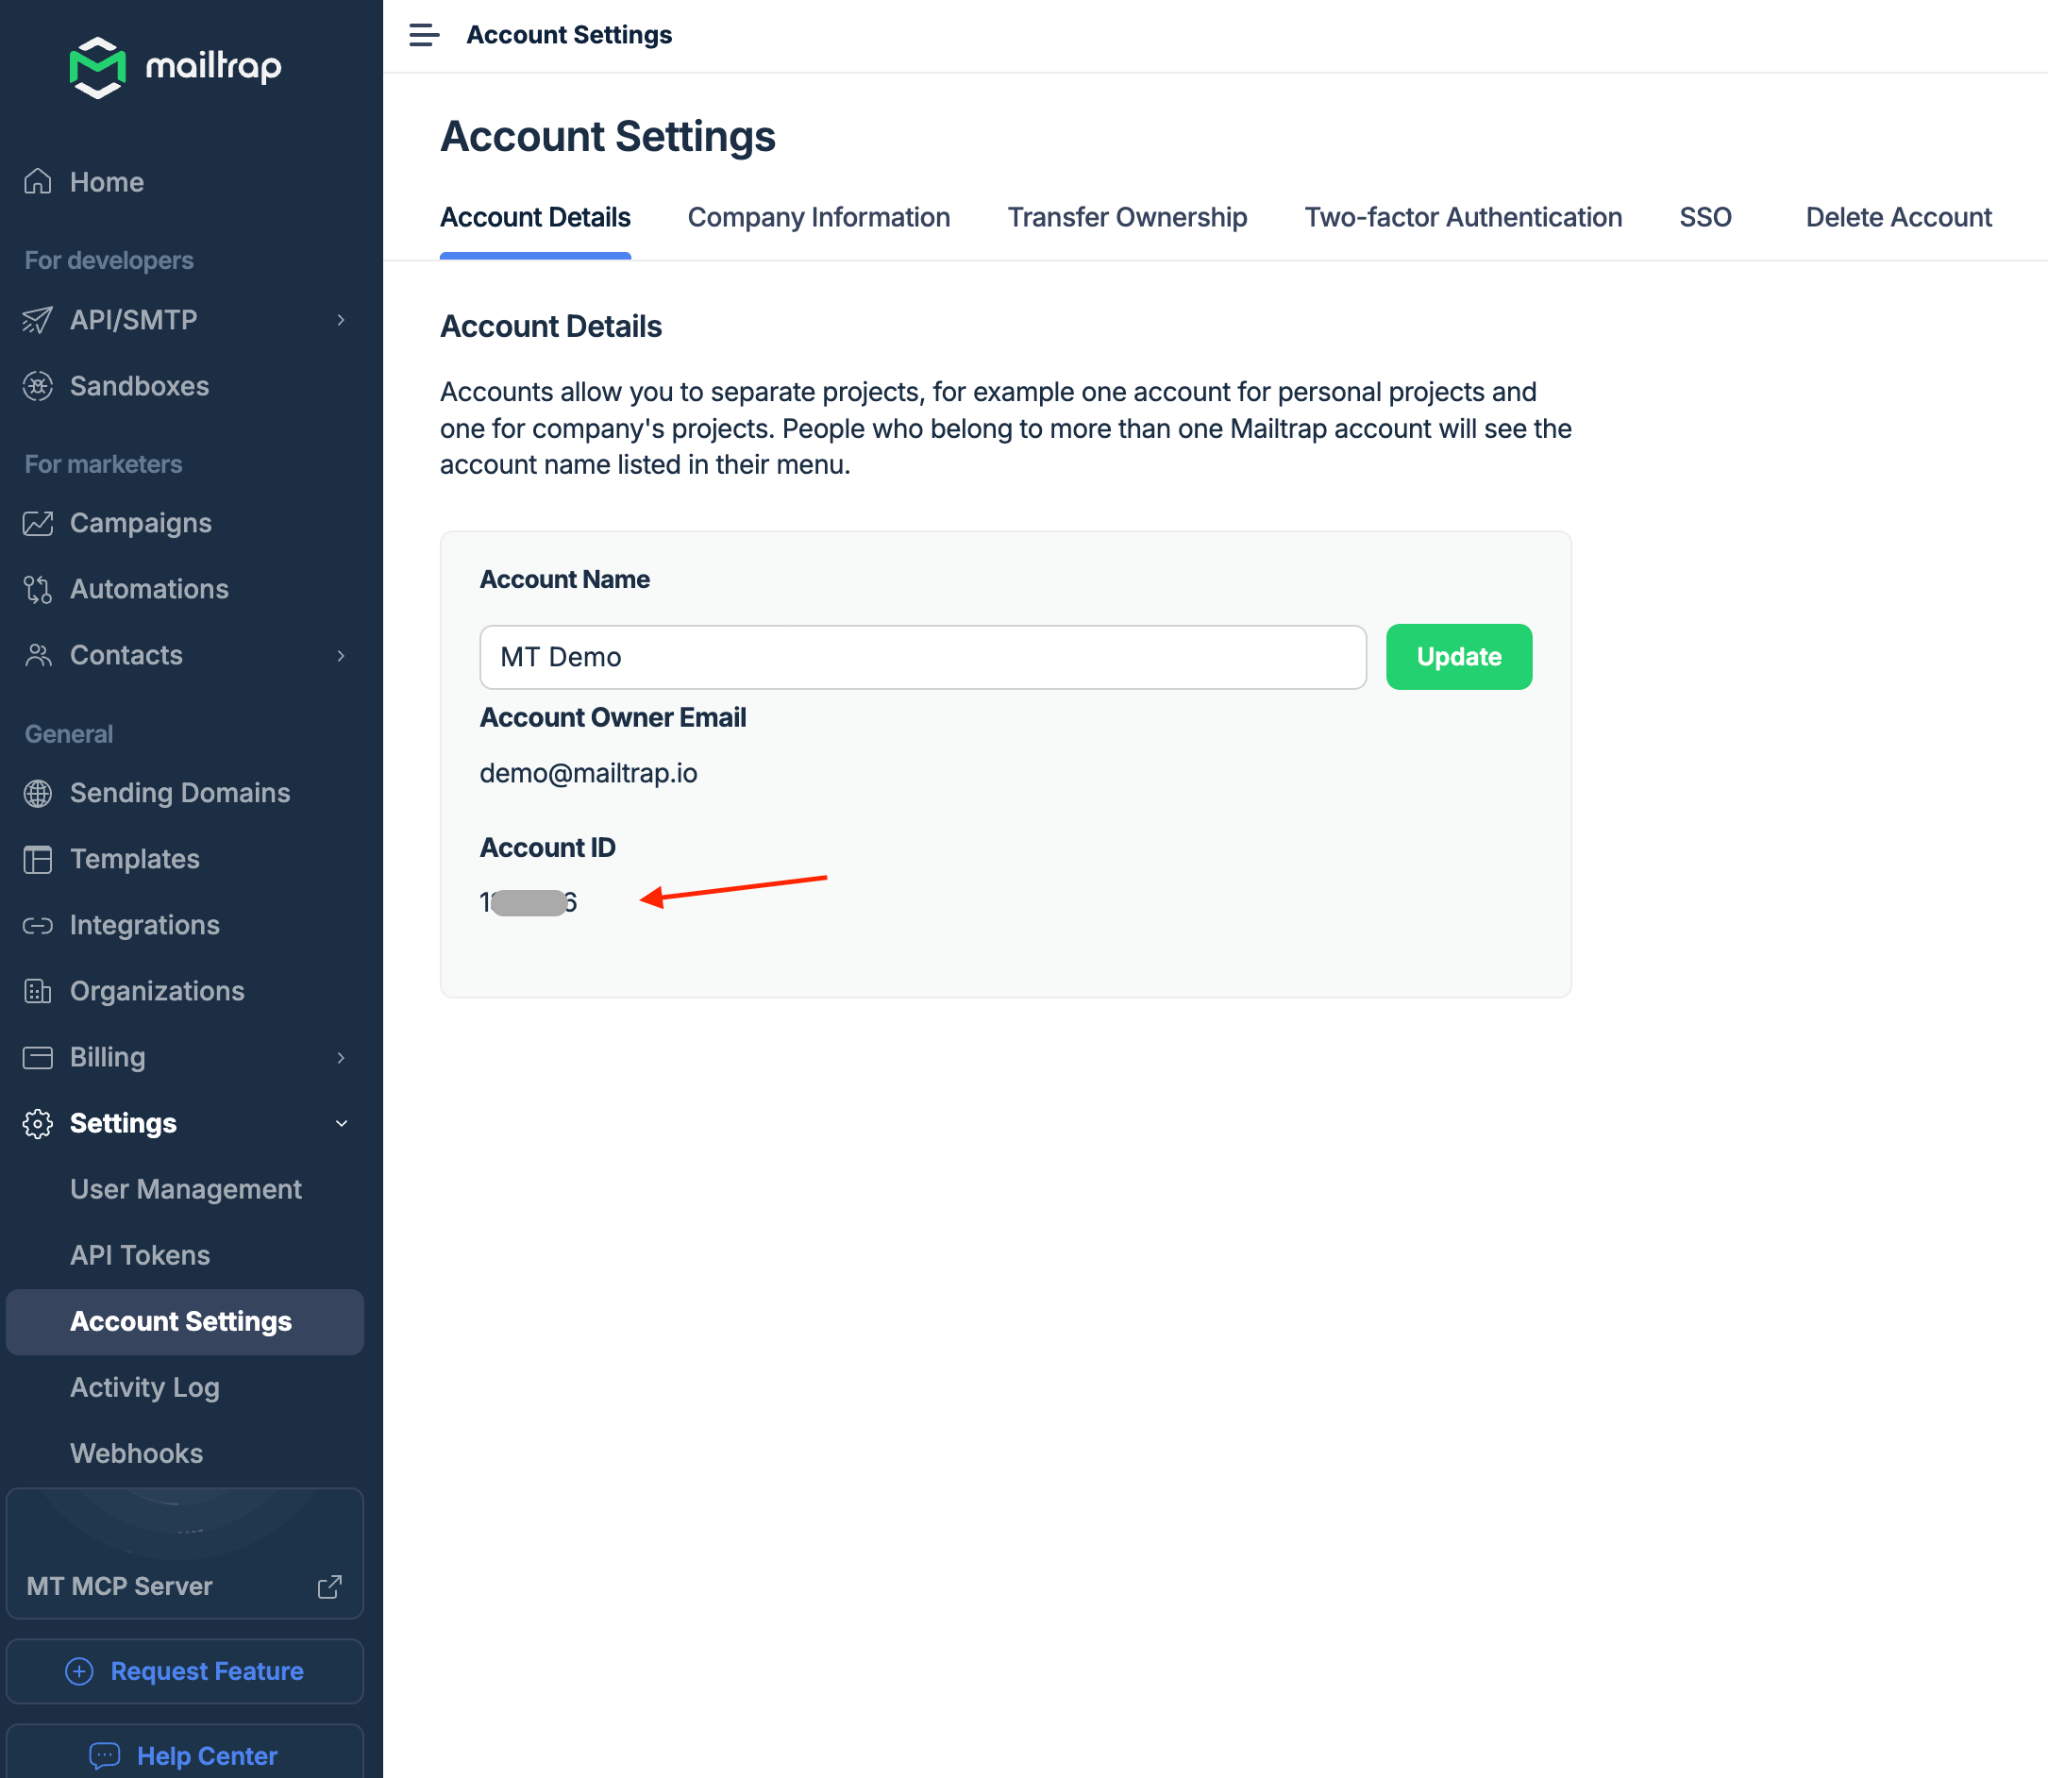
- Account ID (needed if you want to manage contacts) - located in the Account Management tab.
If you plan to organize contacts into lists, grab your List ID as well. You can find this by navigating to your contact list and checking the URL. It'll look like https://mailtrap.io/contacts?filters=..., so just decode the URL to extract the ID.
Pro tip: You can also use the Mailtrap List API for this.
Send emails using Mailtrap Email API/SMTP
I use this prompt structure that's proven reliable across multiple projects:
I need to set up email sending in my Lovable project using Mailtrap.
Configuration:
- Email should be sent via Mailtrap.io, as I have an account there
- My Mailtrap verified domain is [your-domain.com]
- I want to send emails from hello@[your-domain.com]
- Save my Mailtrap API key in  to restrict access
- Save form submission info in DB and create contact in Mailtrap
- Store Mailtrap contact_id in 
- About section explaining our value proposition
- Contact information and social media links
Form Functionality:
- Browser validation for email input (valid emails only)
- Message field minimum 50 characters
- Name field maximum 100 characters
- Form submission triggers:
- Email notification to 
Additionally, you can also provide to or from emails.
Step 3. Connect Lovable project to Supabase
You can choose whatever database you want. However, I always start new Lovable projects by connecting to Supabase, because of the native integration. Additionally, your credentials, like API keys, will be safer since they’ll be referenced as secrets in Supabase.
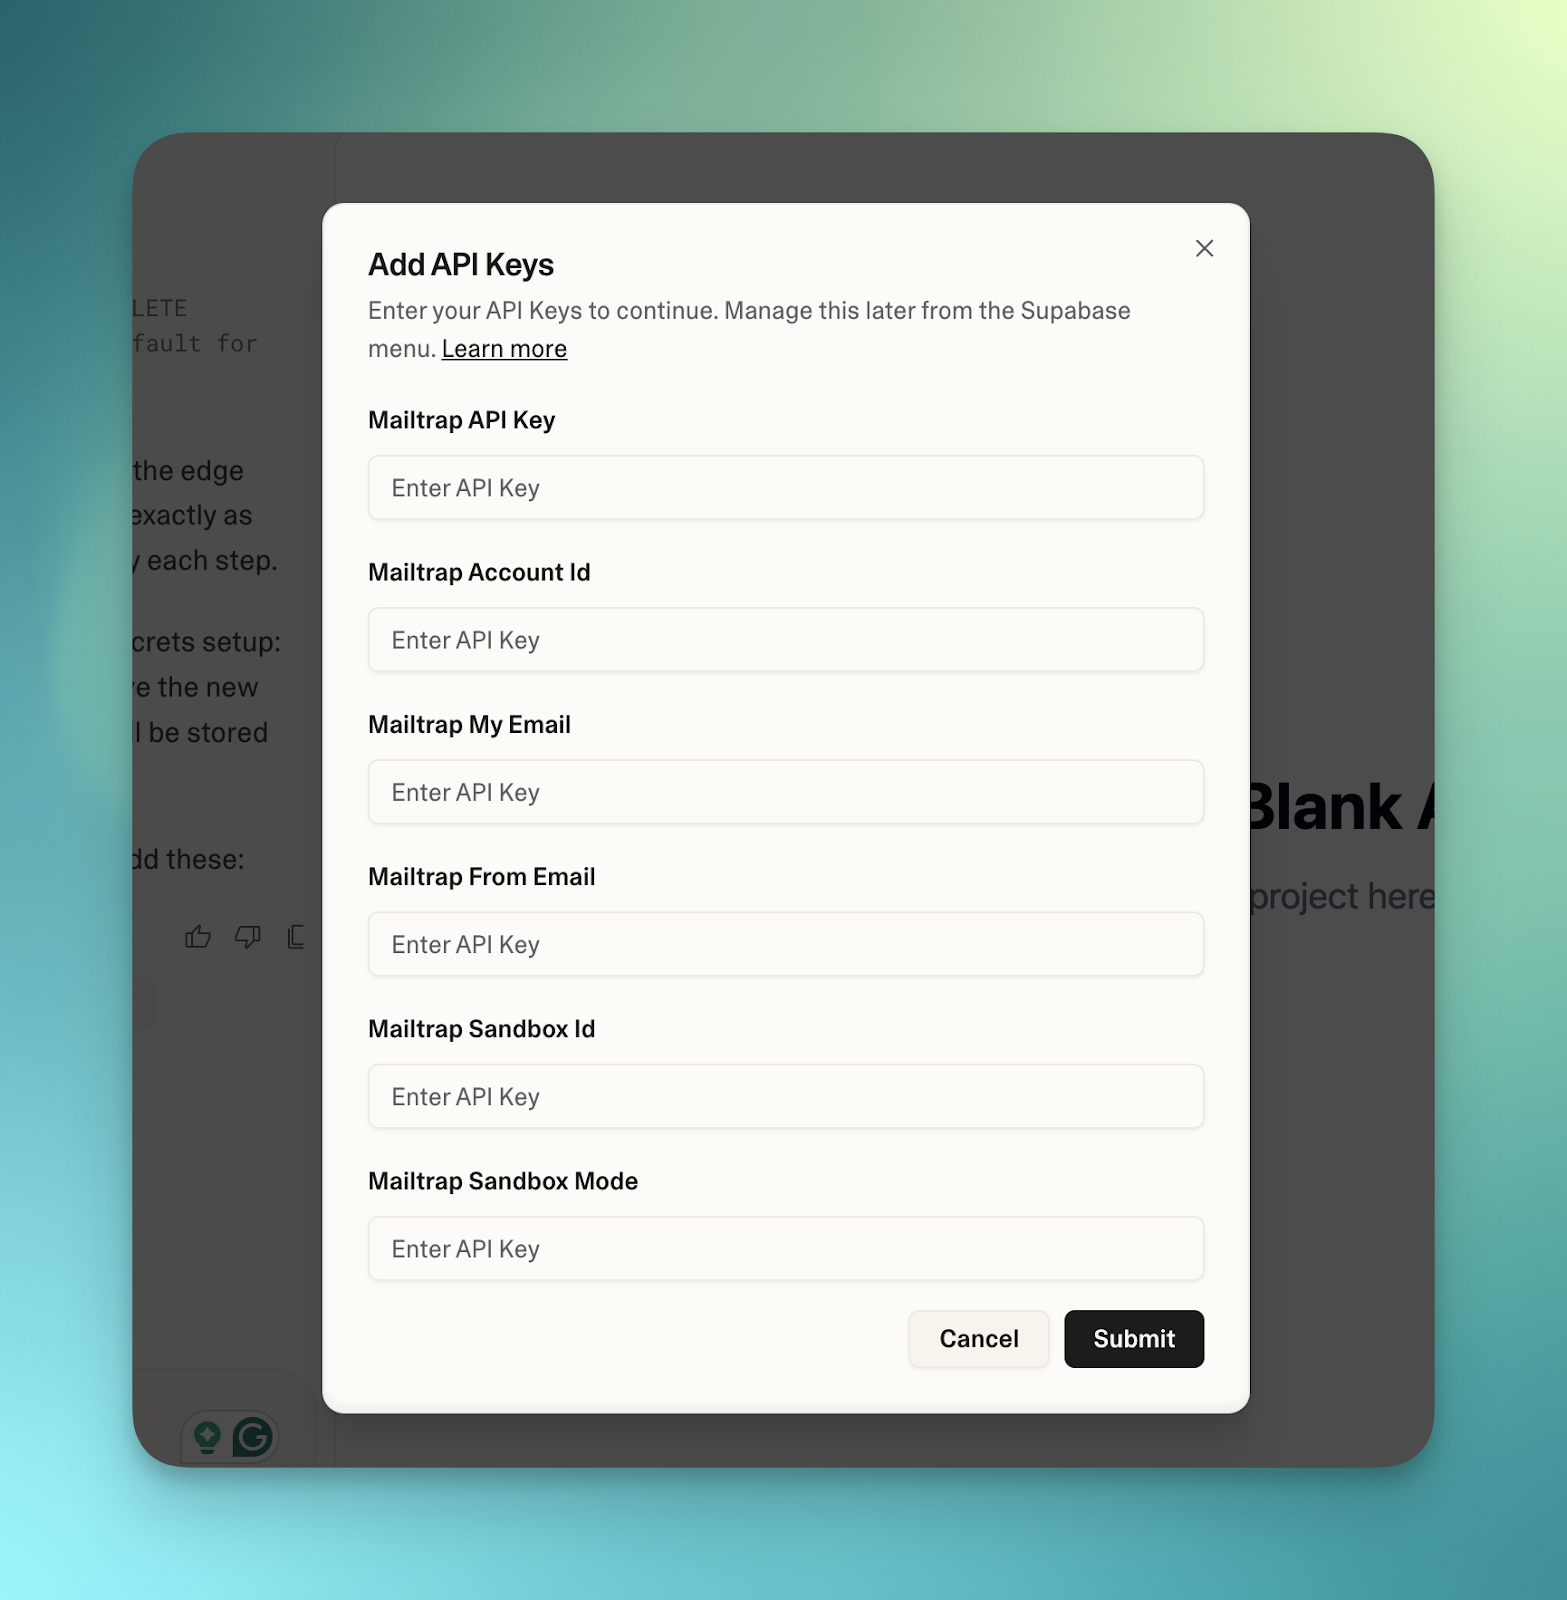
After Lovable generates your application, you'll need to add your Mailtrap credentials to Supabase Secrets.
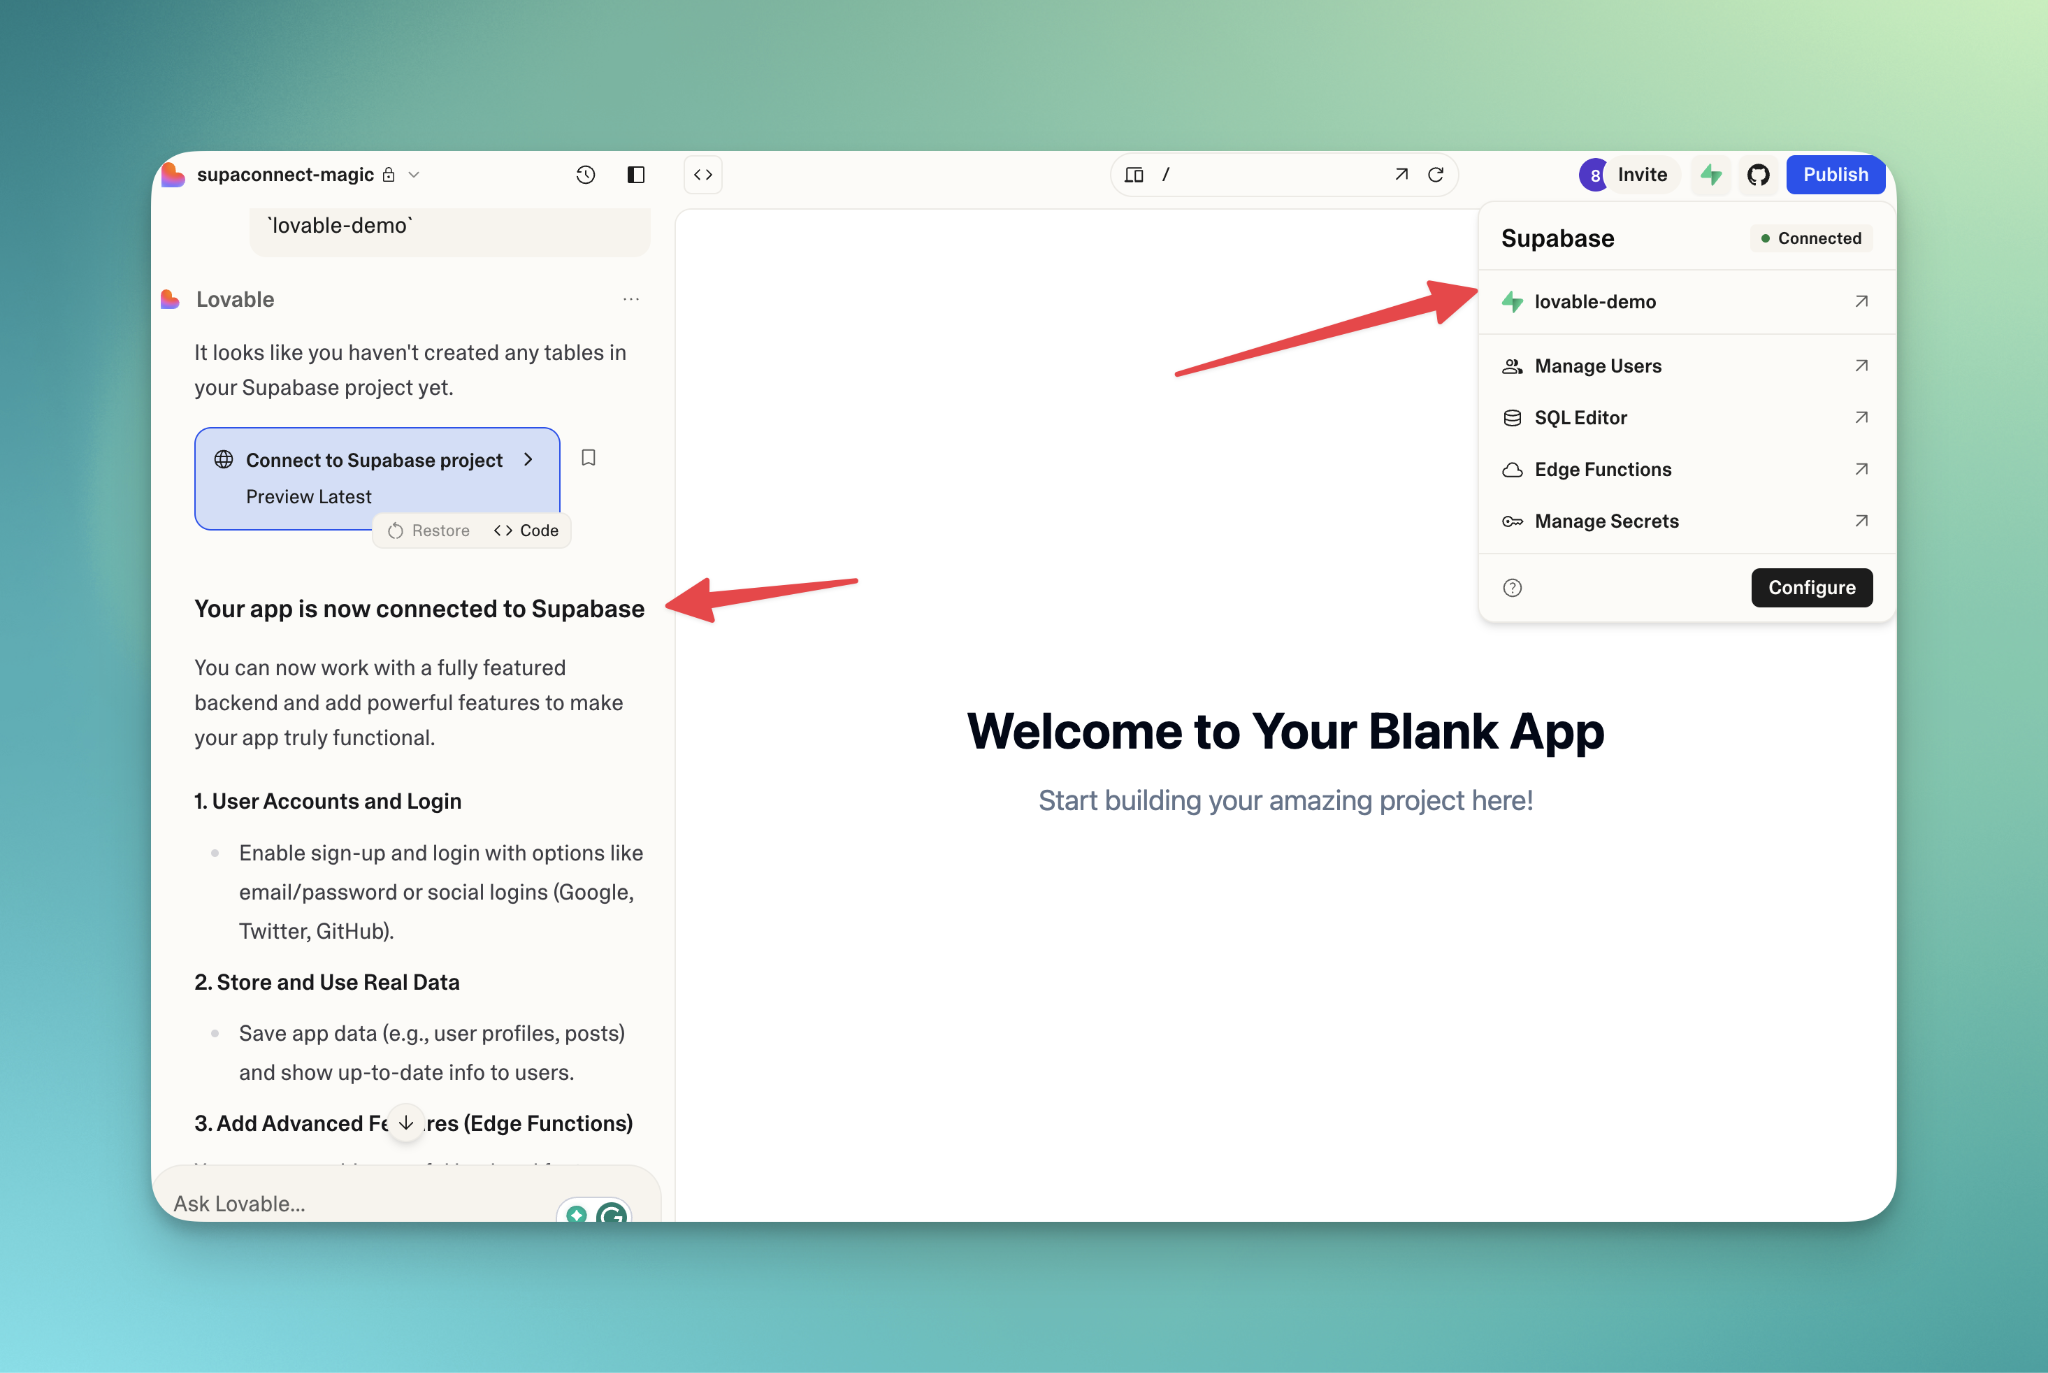
To connect your Lovable project to your Supabase account, click on the Supabase icon in the upper-right corner of a new project. This will open the following window, where you need to enter a project name, and password, and choose the region closest to your recipient.
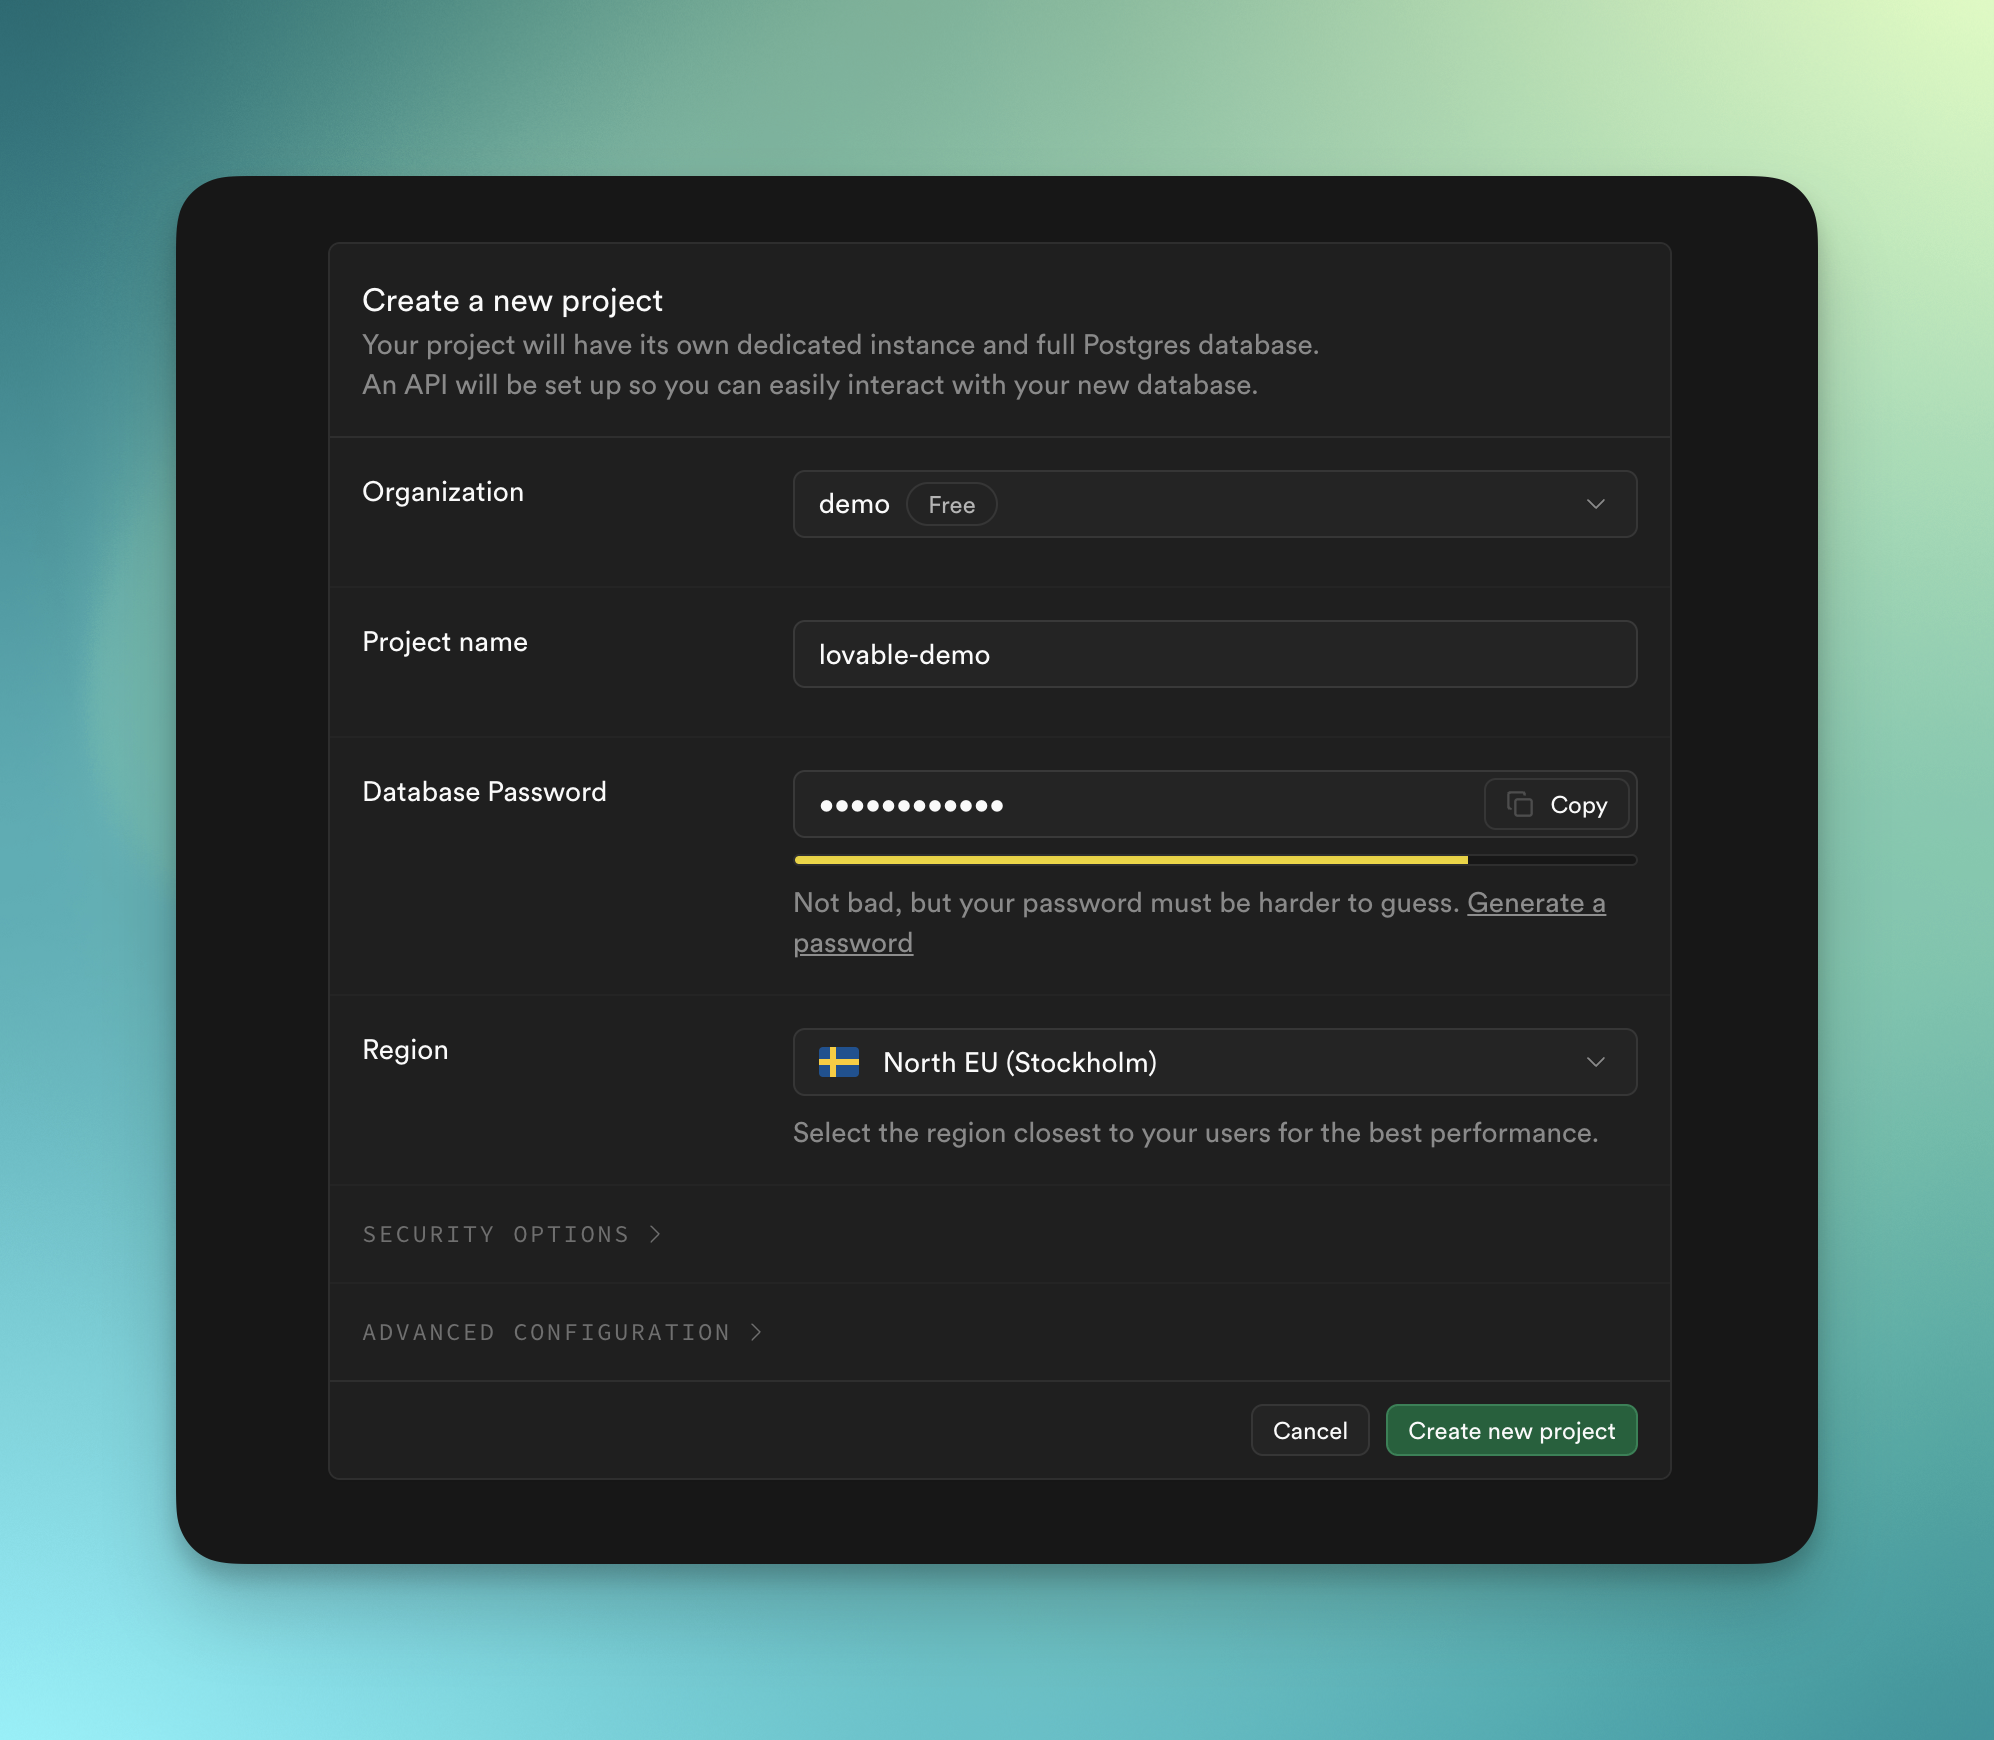
After you click on Create new project, Lovable will confirm that you have successfully connected your app to Supabase.
Step 4. Test project’s setup
Once everything is configured, testing becomes straightforward:
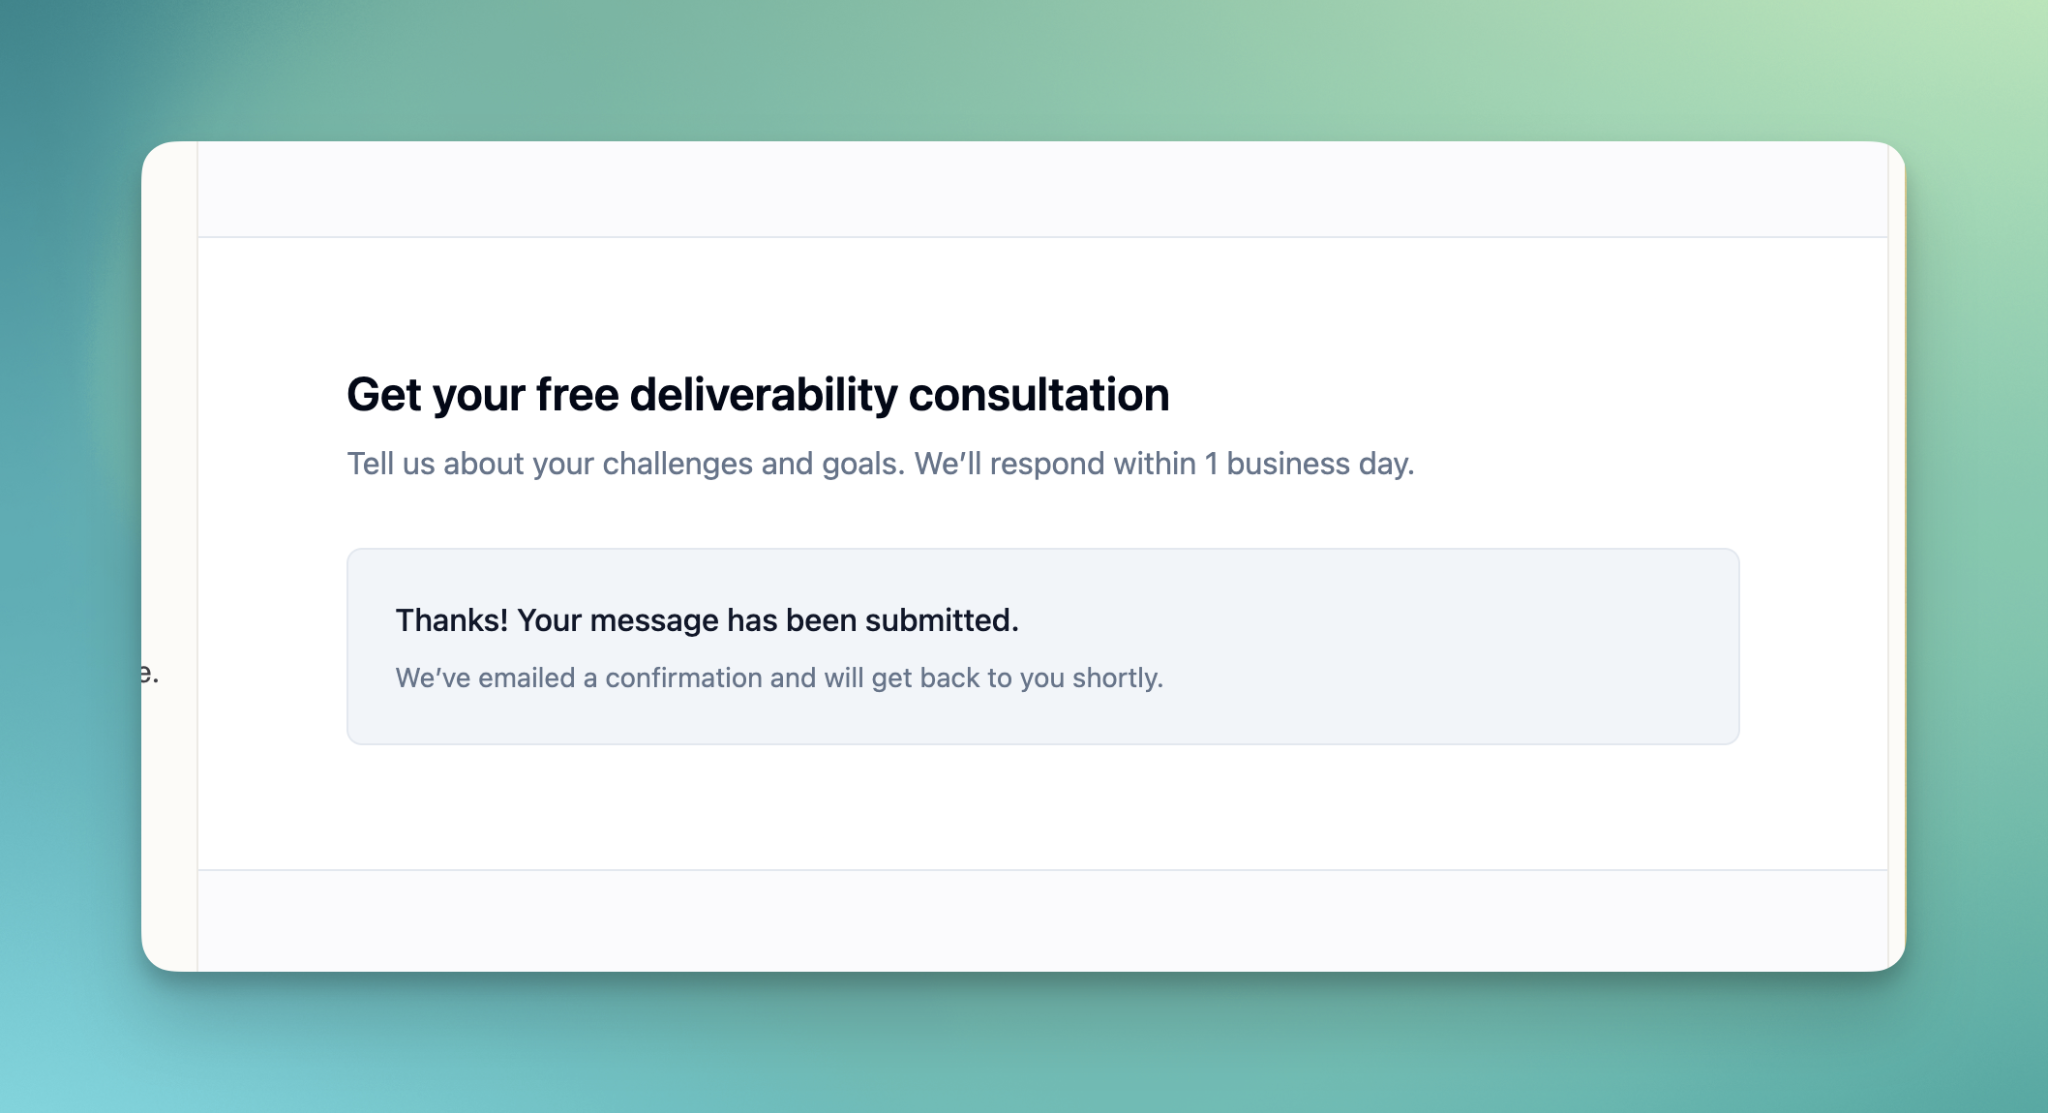
- Submit a test form on your landing page.
- Check for a confirmation message (users should see success feedback).
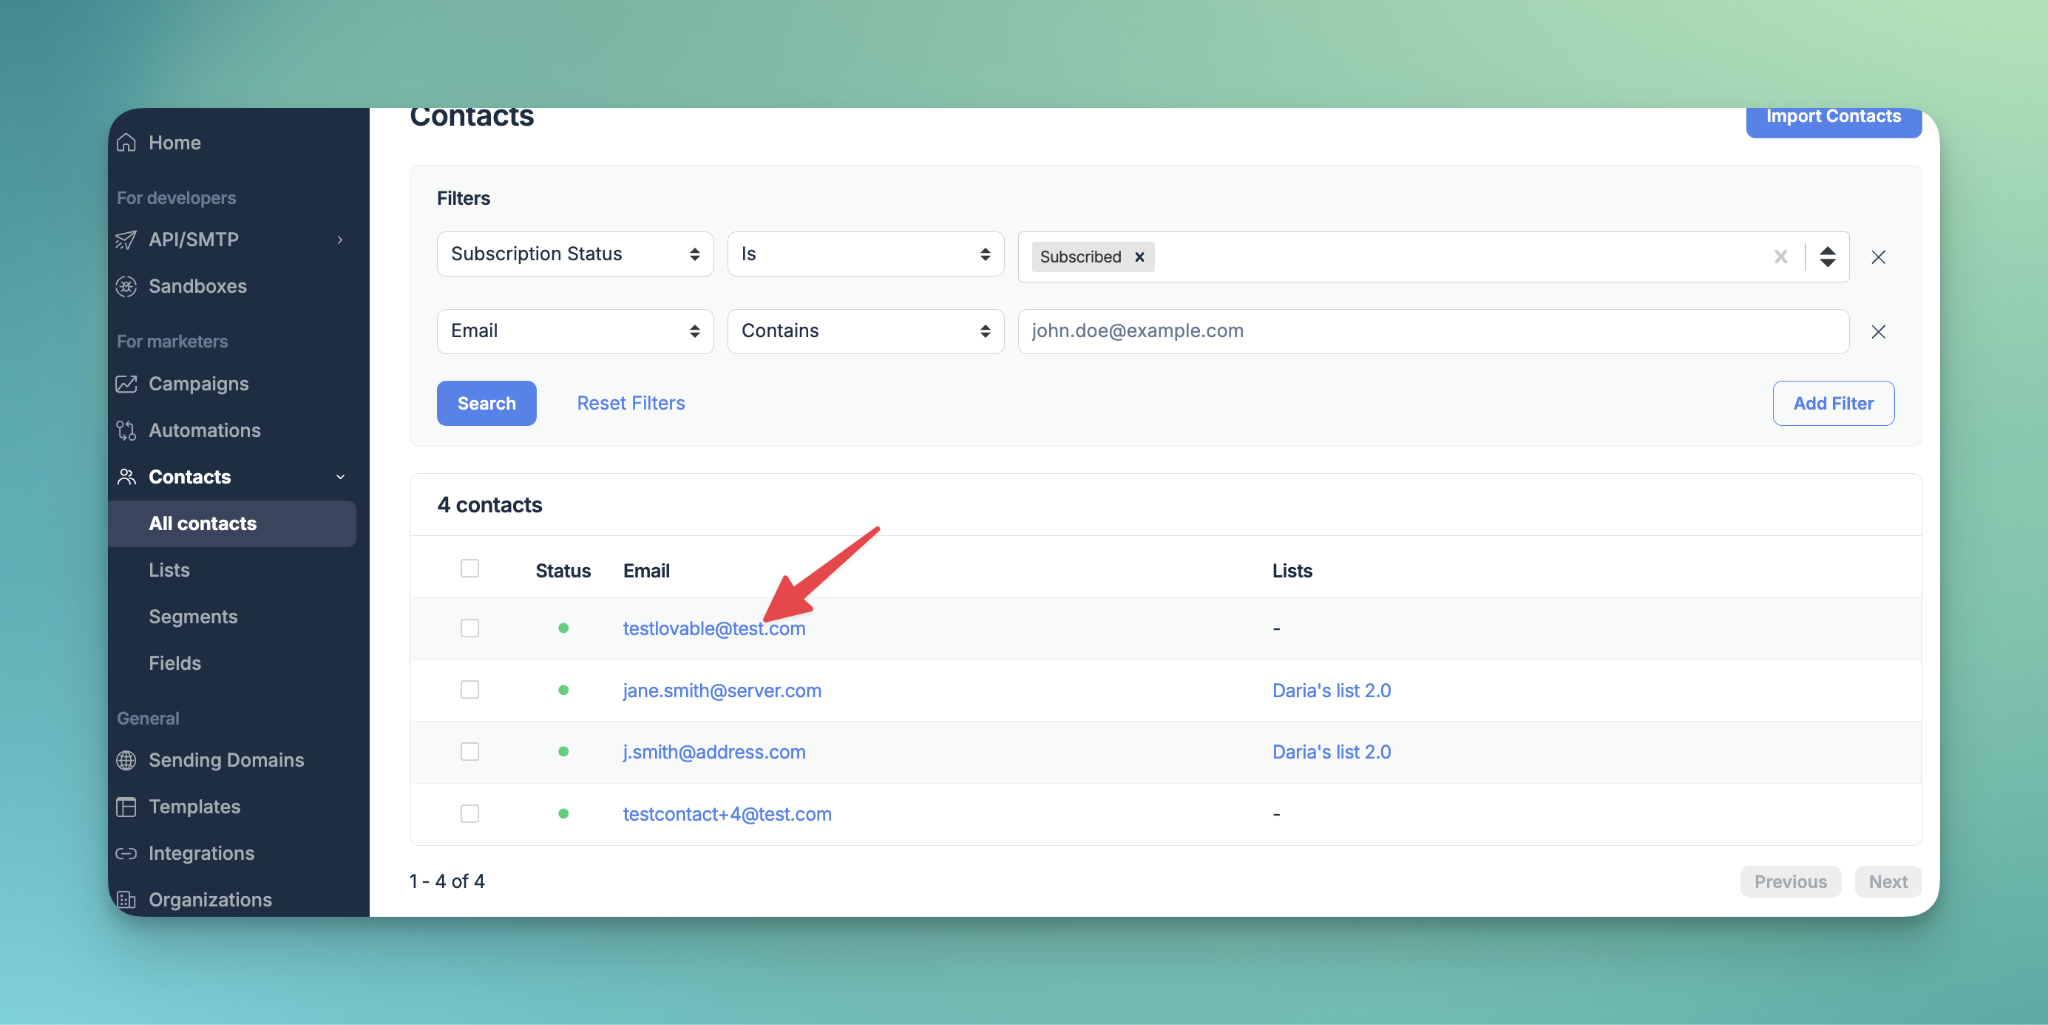
- Verify contact creation in your Mailtrap Contacts dashboard.
- See if the email landed in your inbox.
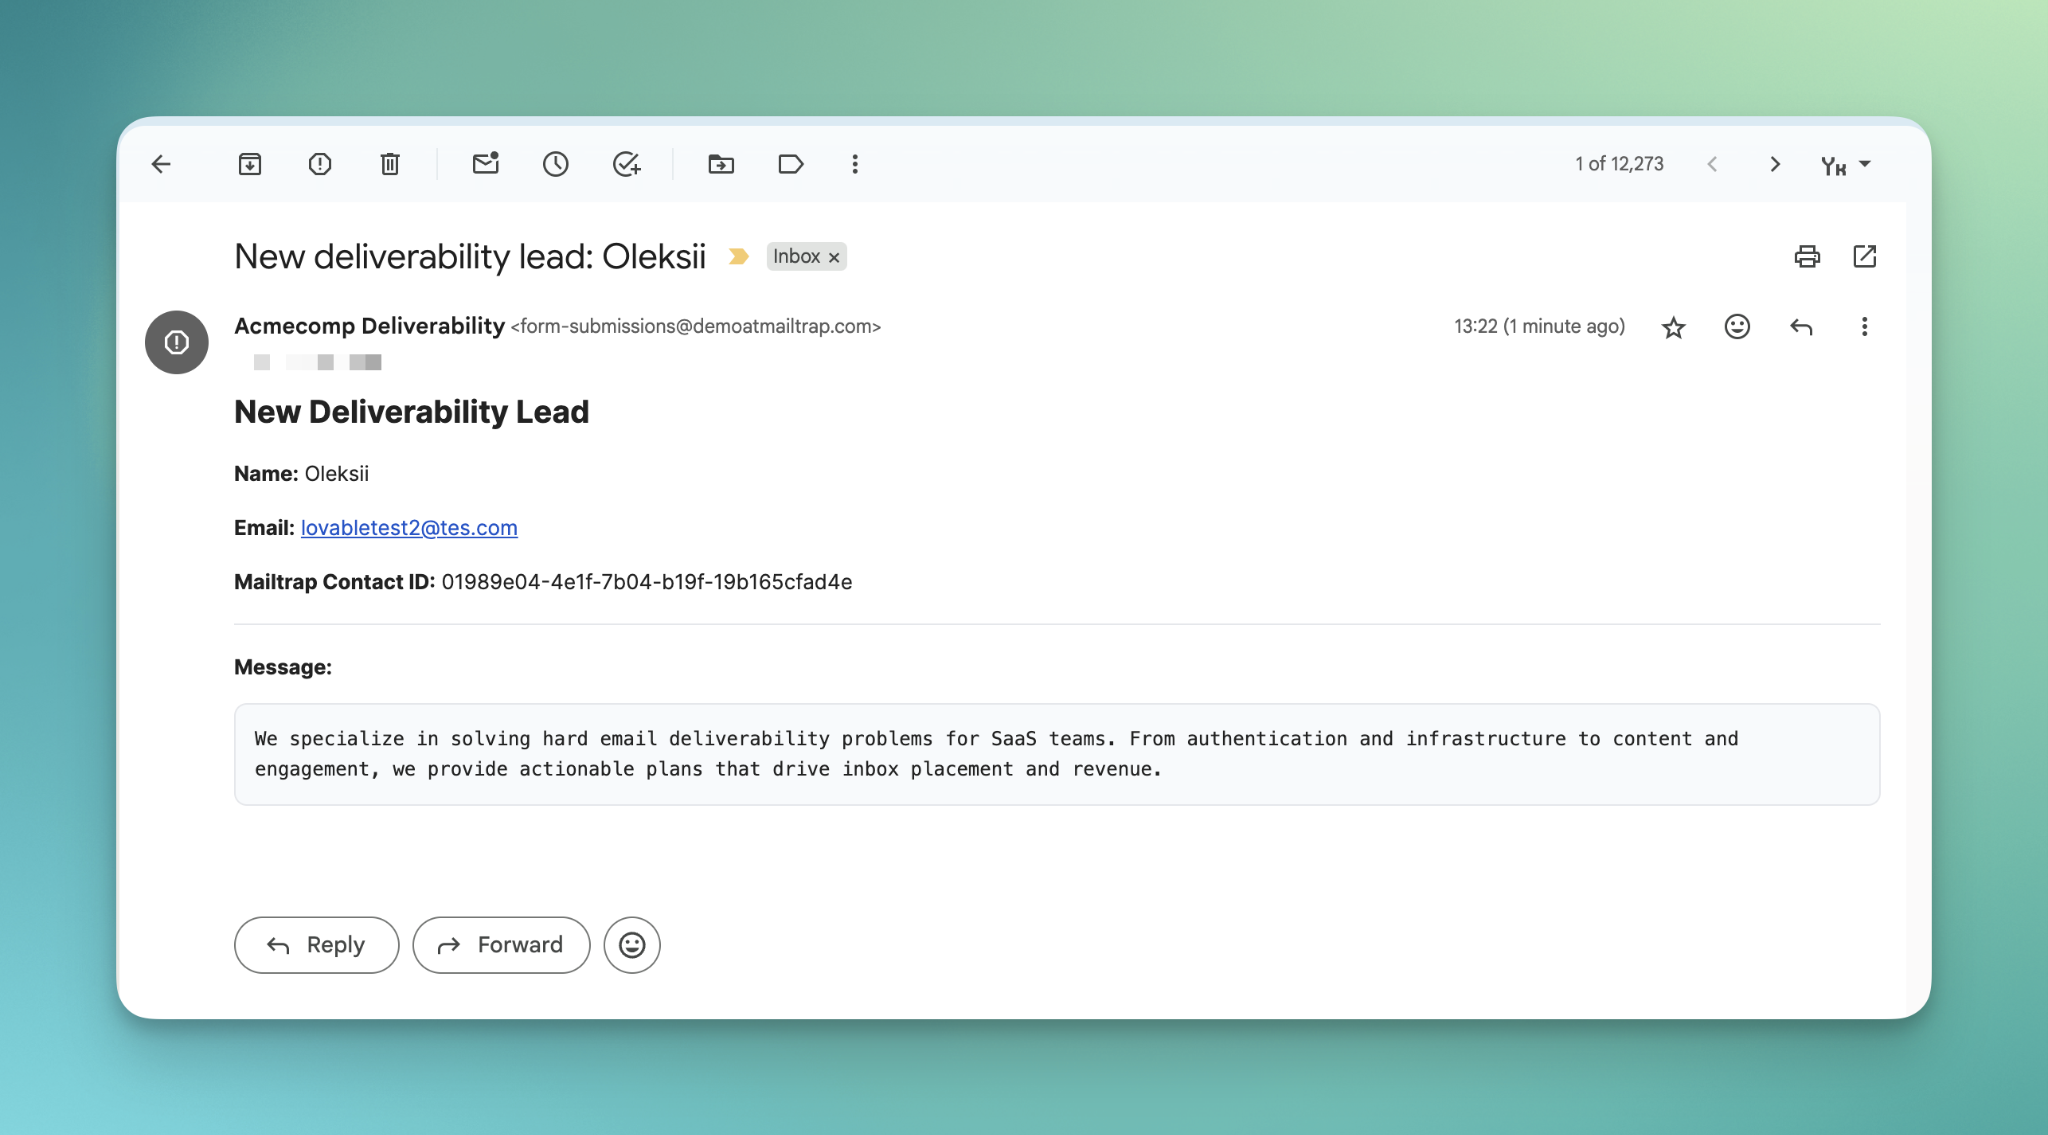
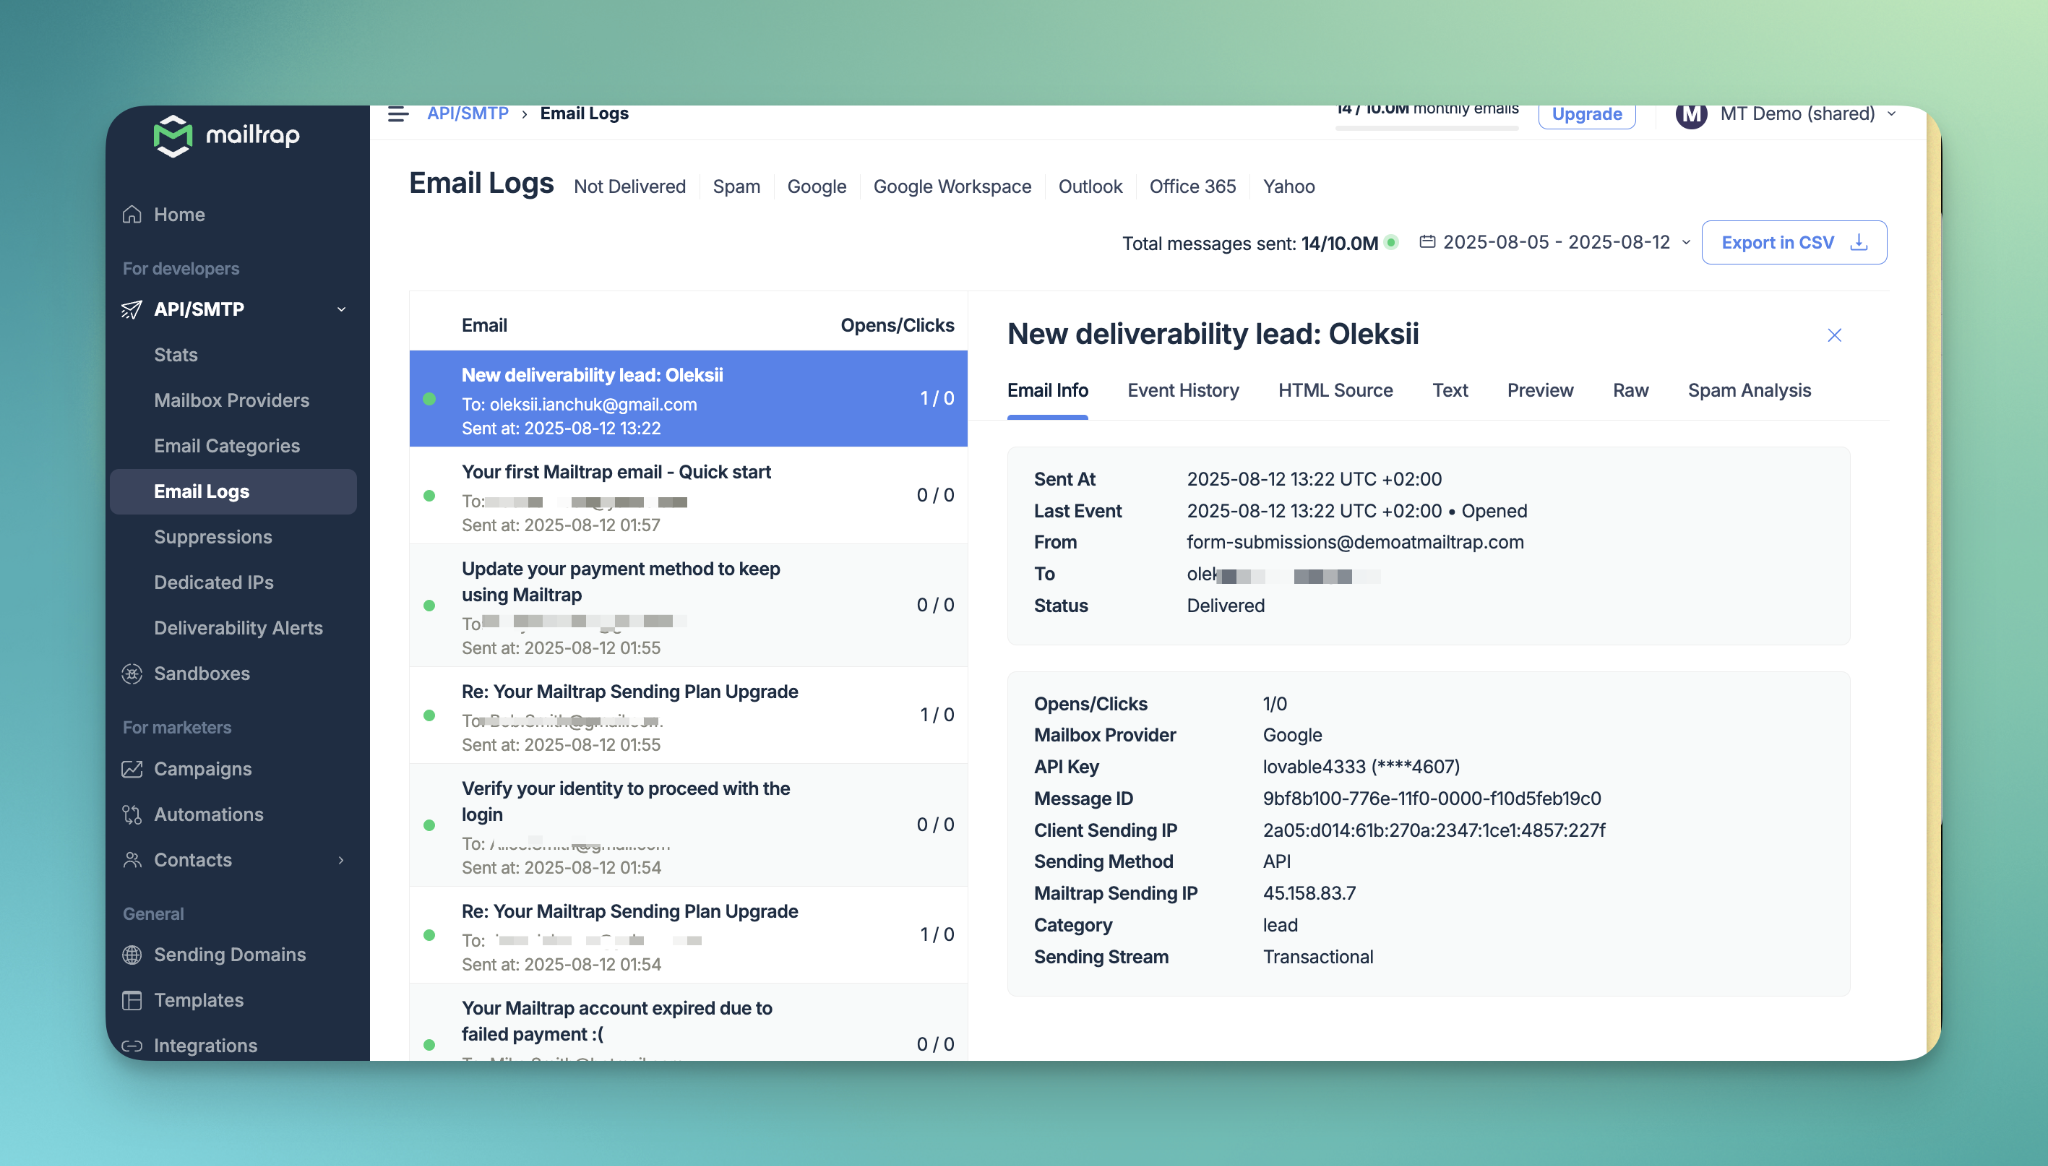
- Review logs in Mailtrap Email Logs section.
I always test the complete flow before considering whether any integration is complete. Edge cases often surface during testing that you won't catch otherwise.
Lovable email sending best practices
Security first
After deploying dozens of Lovable applications, I've learned these security essentials:
- Always store sensitive information in Supabase Secrets, never in code
- Enable Row-Level Security (RLS) on all database tables
- Rotate API keys regularly (I do this quarterly)
- Use HTTPS for all email-related endpoints
Deliverability optimization
Email deliverability can make or break your application. Here's what works:
- Use verified domains for all outgoing emails
- Monitor sender reputation through Mailtrap's analytics
- Keep contact lists clean by handling bounces properly
- Implement proper SPF, DKIM, and DMARC records
UX polish
Small details matter in production applications:
- Provide clear feedback when forms are submitted
- Include proper validation messages with helpful text
- Add loading states during form submission
- Handle errors gracefully with user-friendly messages
Performance considerations
Lovable applications can handle significant scale with proper setup:#
- Use Supabase Edge Functions for all server-side logic
- Implement comprehensive error handling and retries
- Consider rate limiting for form submissions
- Monitor API usage and set up alerts for unusual activity
Advanced: email sending scaling
As your Lovable application grows, consider these scaling strategies:
Database optimization
- Index your contacts table properly for fast lookups
- Implement pagination for large contact lists
Email volume management
- Monitor your Mailtrap usage limits
- Implement batch processing for large email sends
Multi-tenant architecture
For SaaS applications serving multiple customers, design your contact management system with proper tenant isolation from the start. That is, if you want to save significant refactoring later.
Summing up
And that’s it for today!
Feel free to check the official documentation once you start working on your Lovable project:
With a flexible AI app builder as Lovable is, you’re not limited in your choice of email sending solution or database, or the way you implement a contact form. So, make sure to apply the steps and principles we walked through today and build something amazing!
See Also
- PHP Mail Script for Testing Email Sending
- For a full list of the articles on Tek Eye, see the full site Index.
Author:Mailtrap via Alina Obminiana Published:


